Kubernetes Health Probes: Liveness, Readiness, and Startup Explained
A running process is not a healthy application. Kubernetes can tell you whether a container’s PID exists, but it cannot tell you whether your application is deadlocked, stuck in an infinite loop, or throwing OutOfMemoryError behind a green status light.
Health probes solve this by shifting responsibility from the platform to the application itself. Instead of Kubernetes guessing from the outside, your application reports its own internal state.
This post walks through the three probe types, when each one applies, and how to configure them without introducing the very instability they’re meant to prevent.
The Problem: The Zombie Process
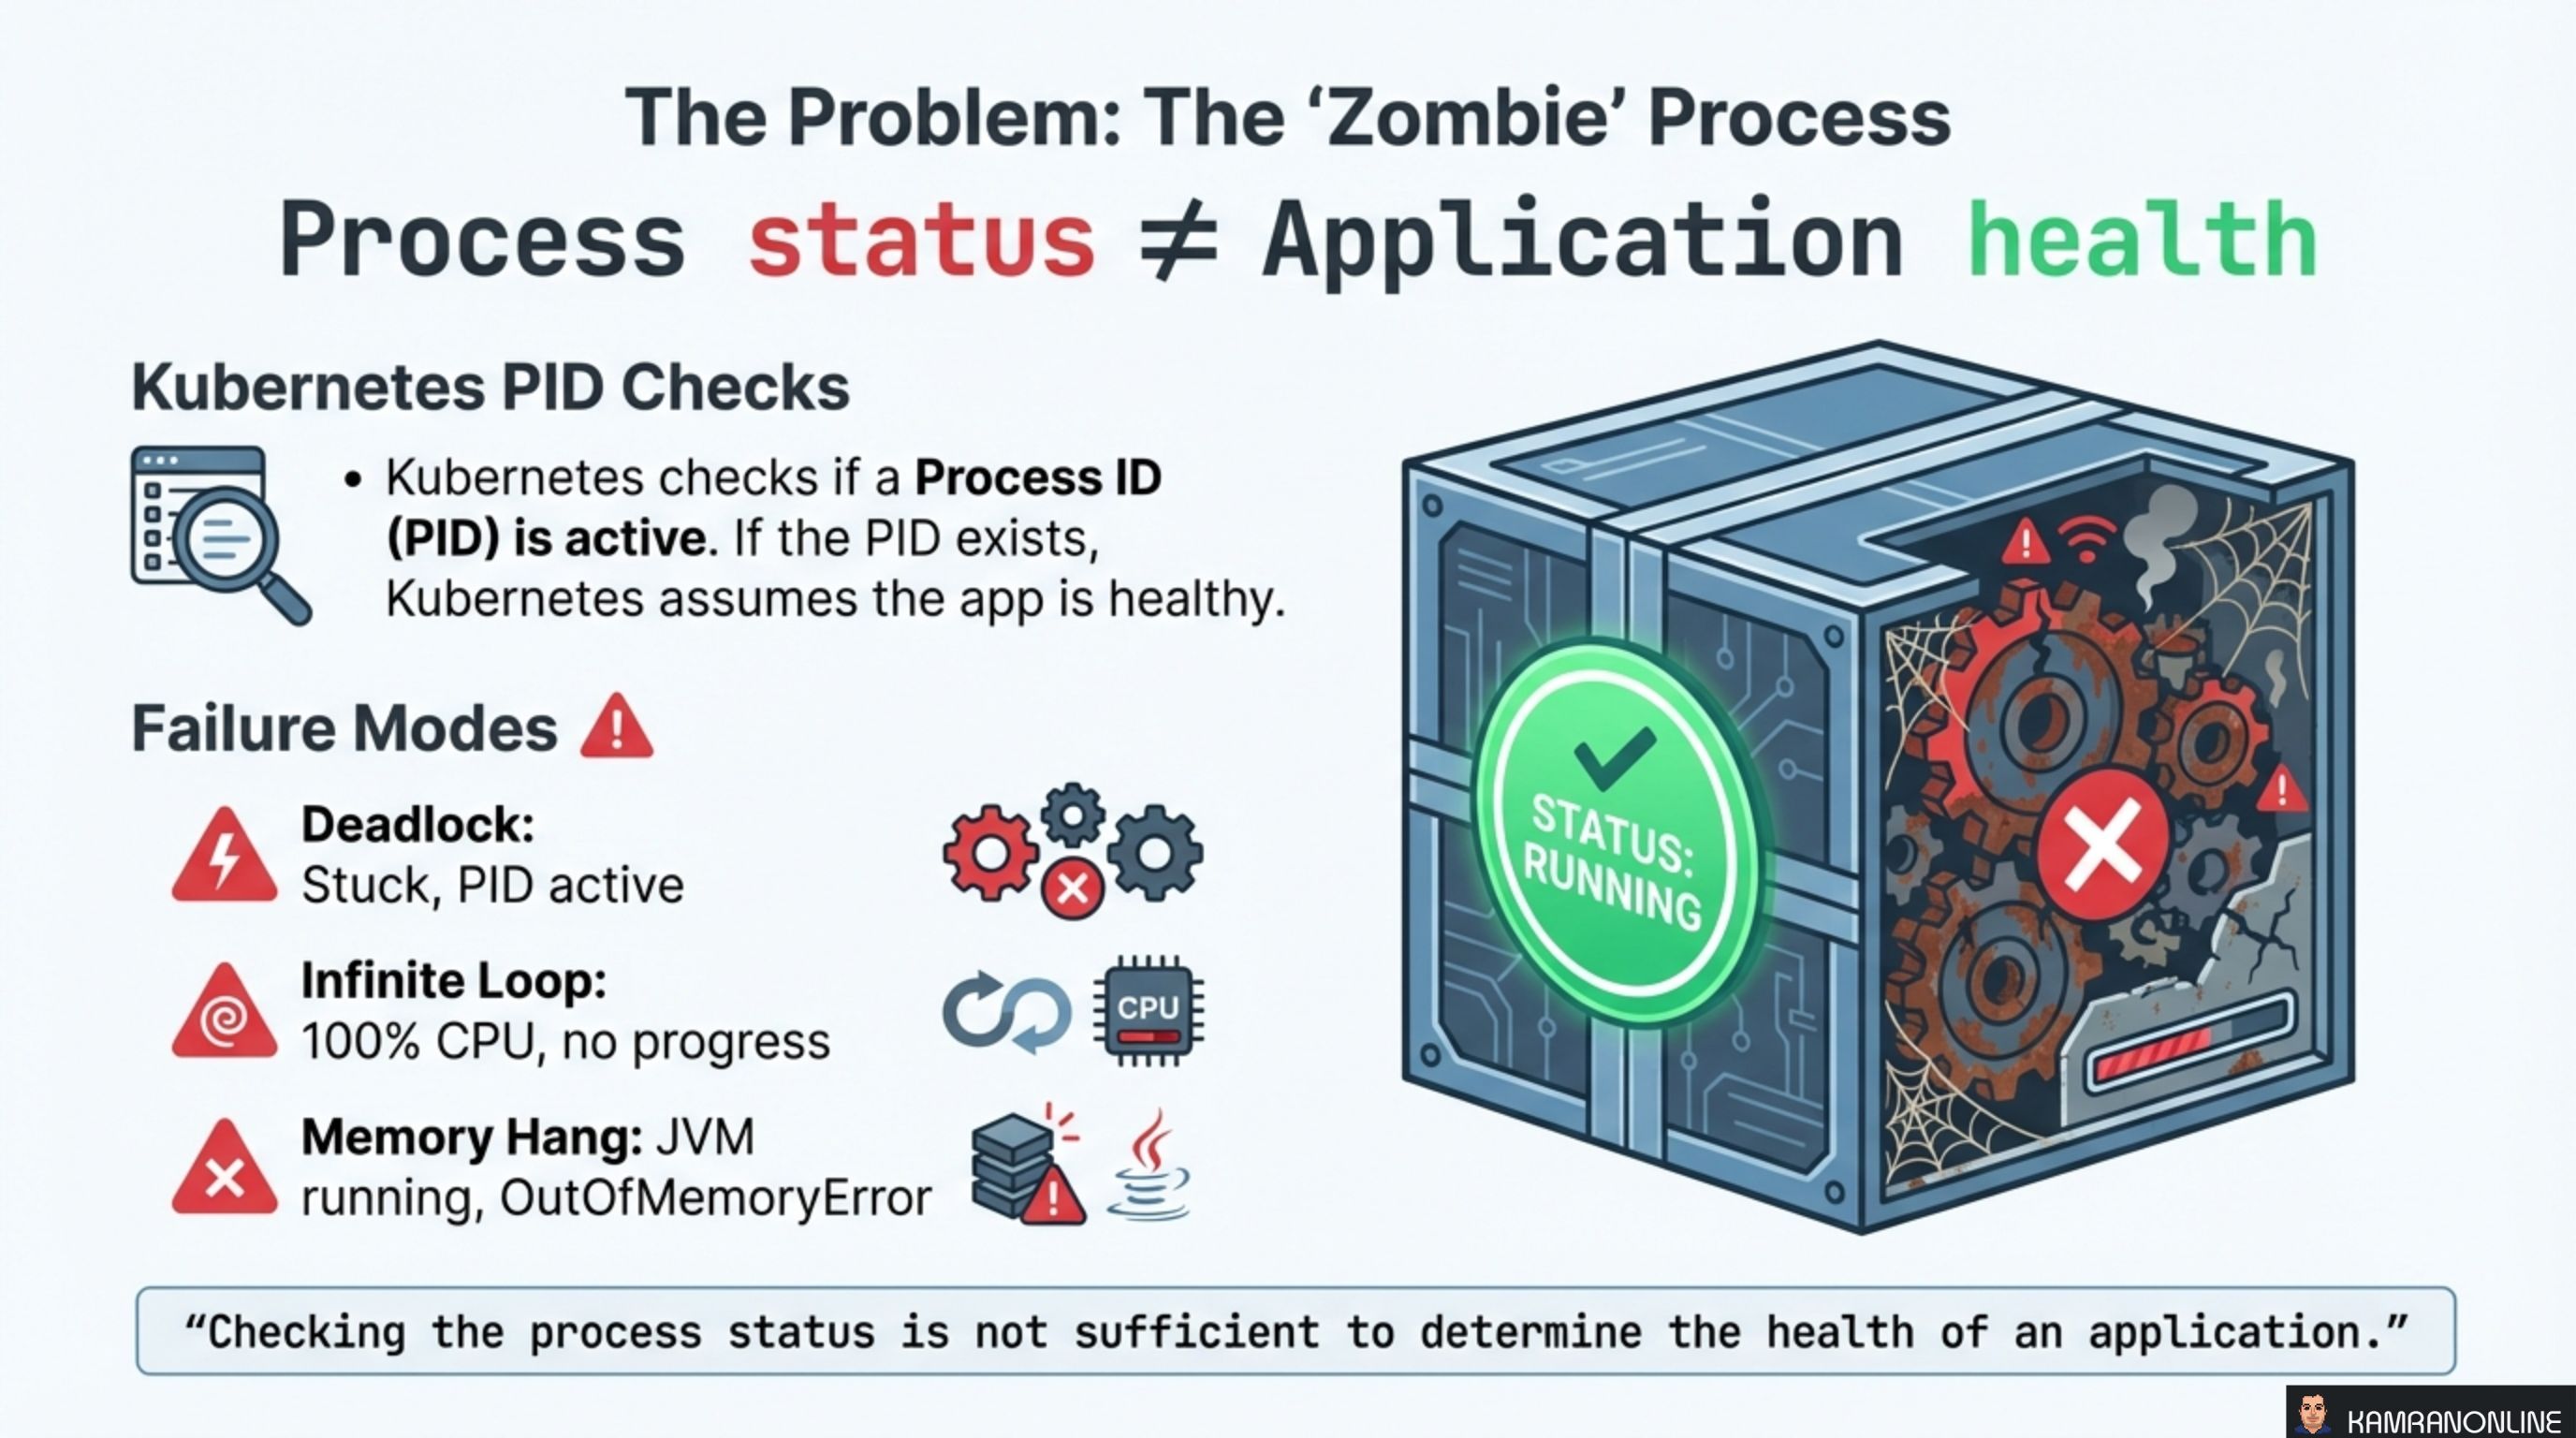
By default, Kubernetes checks if a Process ID (PID) is active. If the PID exists, the container is considered healthy. But a running process and a functioning application are two different things.
Three common failure modes expose this gap:
- Deadlock — the application is stuck, threads are blocked, but the PID is still alive
- Infinite Loop — CPU is pegged at 100%, no useful work is being done, but the process is technically running
- Memory Hang — the JVM is running but the application is drowning in
OutOfMemoryErrorexceptions
In all three cases, Kubernetes sees a running container and keeps routing traffic to it. Users experience failures while the platform reports everything is green.
“Checking the process status is not sufficient to determine the health of an application.”
The Solution: Inversion of Control
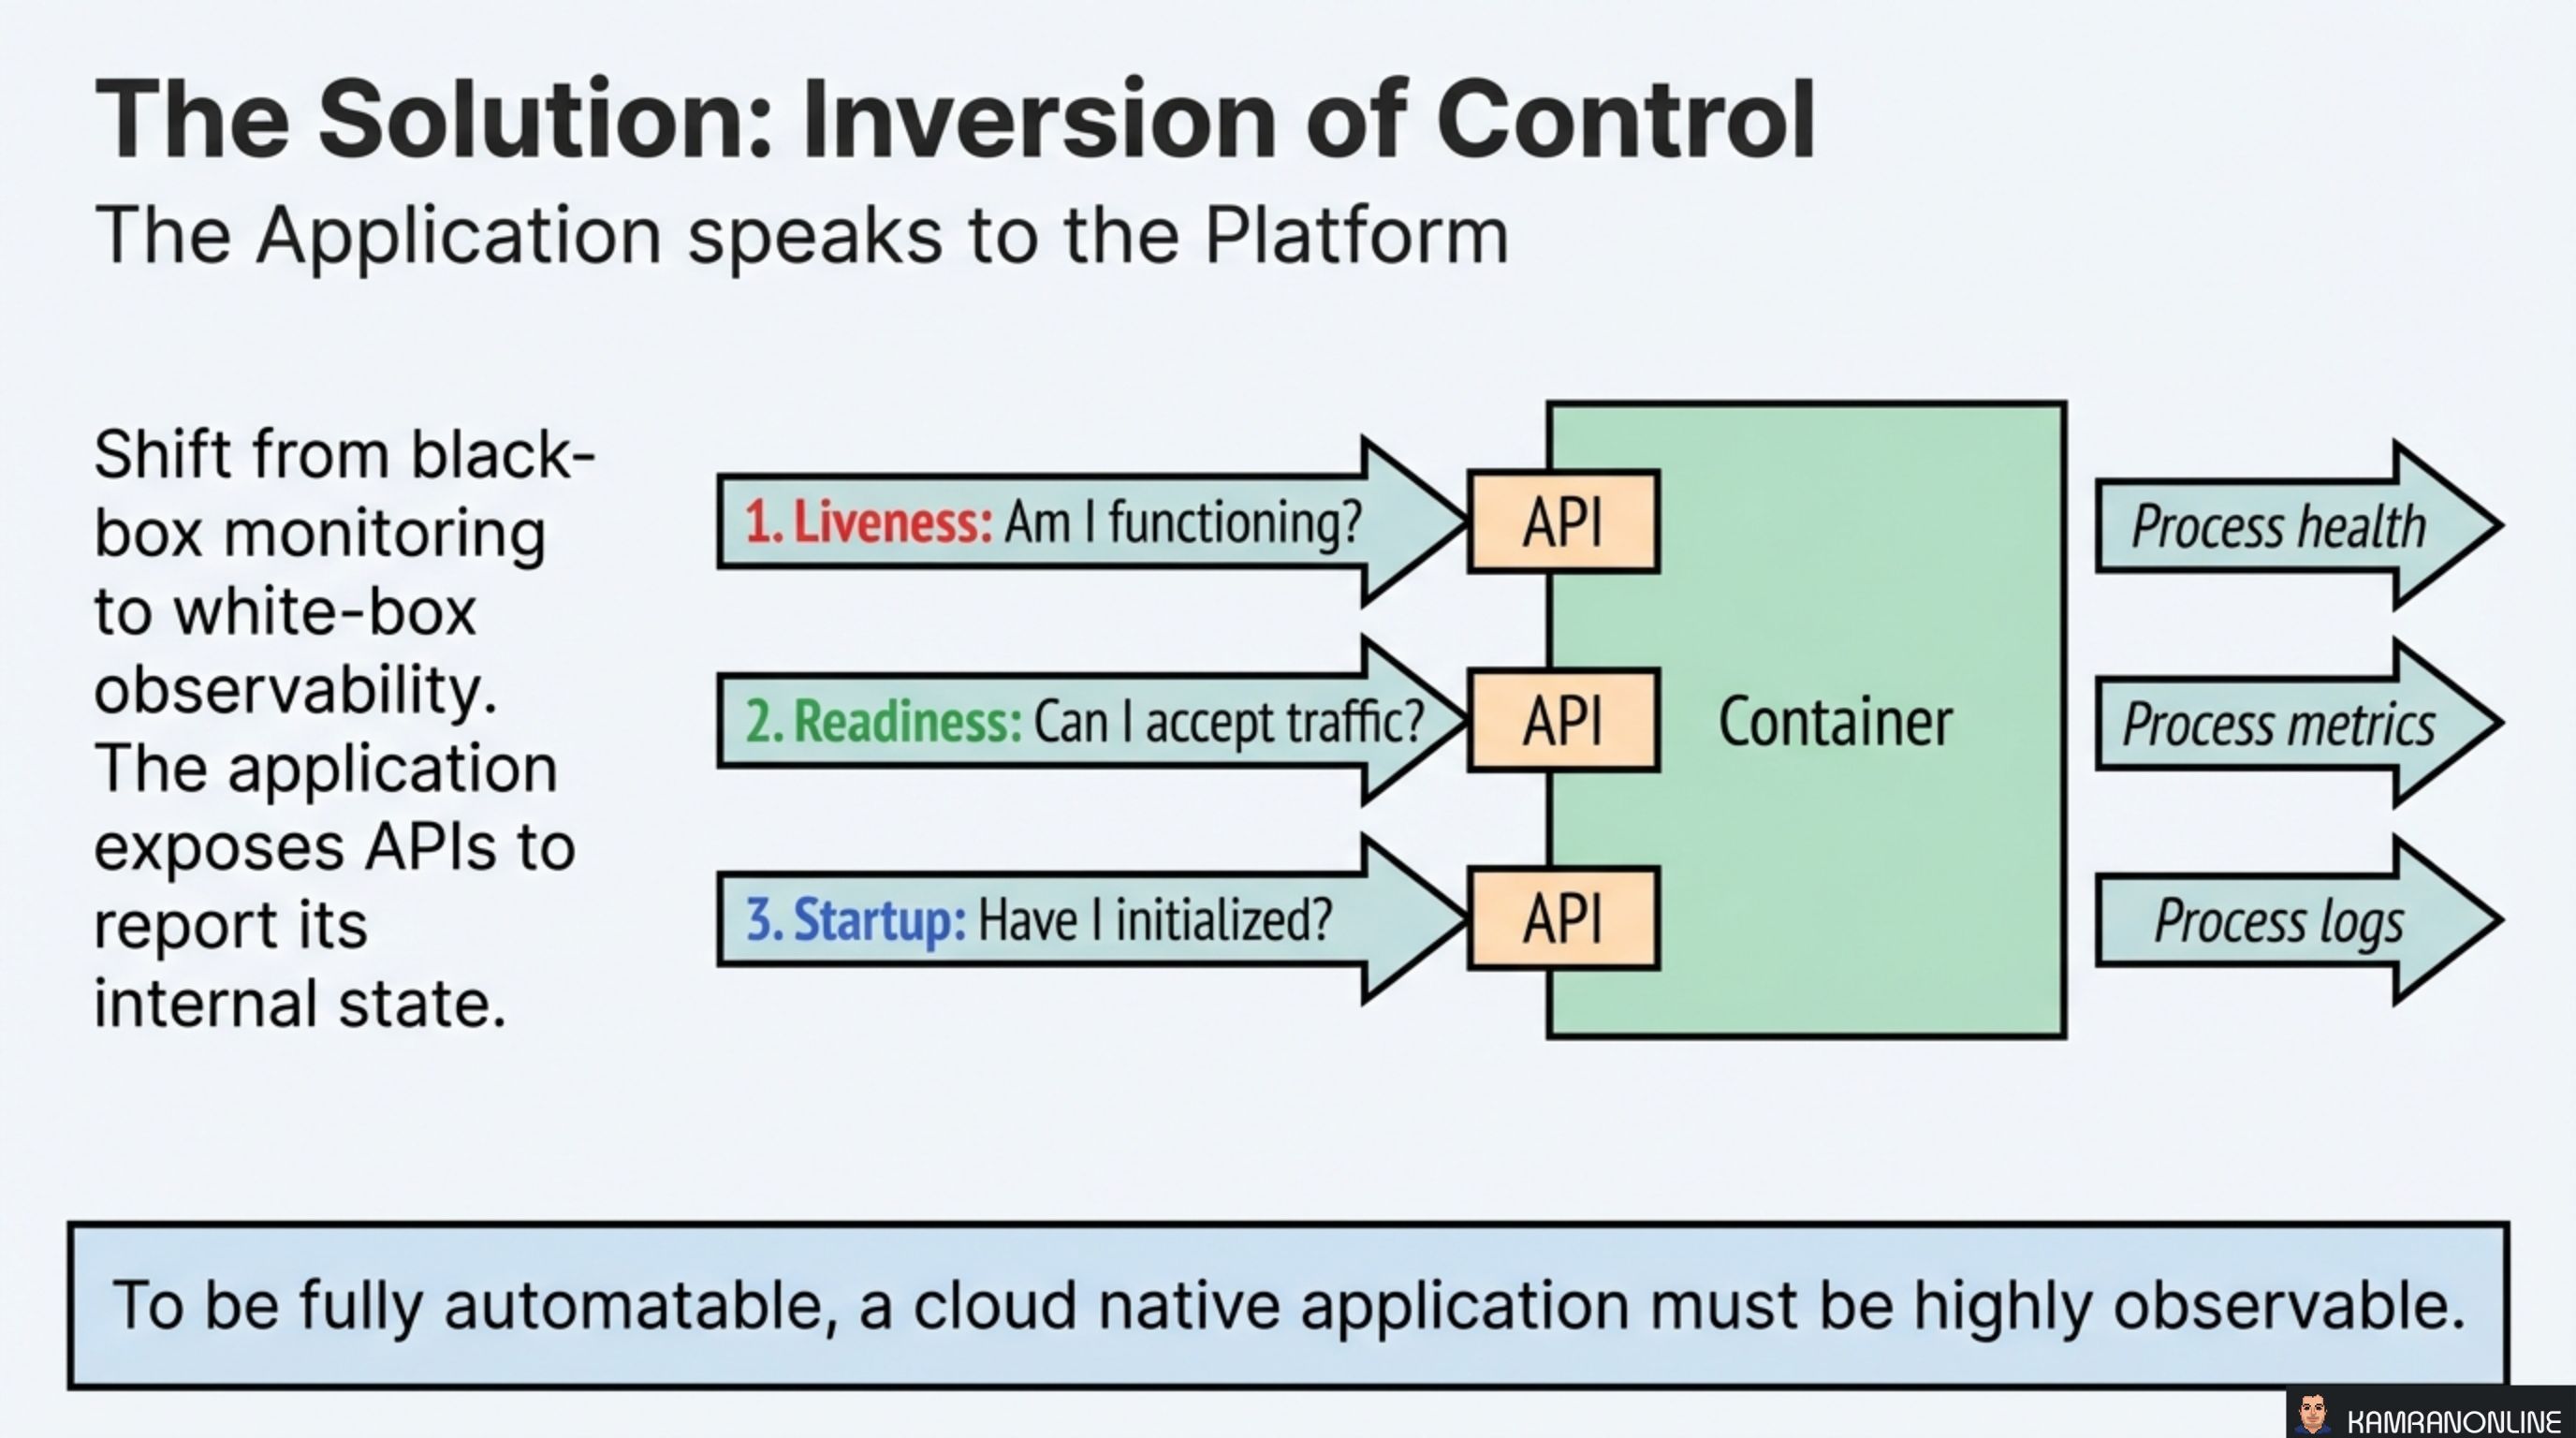
The fix is a shift from black-box monitoring to white-box observability. Instead of the platform probing the process from the outside, the application exposes APIs that report its internal state. Kubernetes queries these endpoints and acts on the responses.
Three probe types map to three questions:
- Liveness — “Am I functioning?” → Reports process health
- Readiness — “Can I accept traffic?” → Reports process metrics
- Startup — “Have I initialized?” → Reports process logs
To be fully automatable, a cloud native application must be highly observable.
Each probe type triggers a different Kubernetes action. Getting the mapping wrong — checking the wrong thing with the wrong probe — is the most common source of probe-related incidents.
Liveness Probes: The Defibrillator
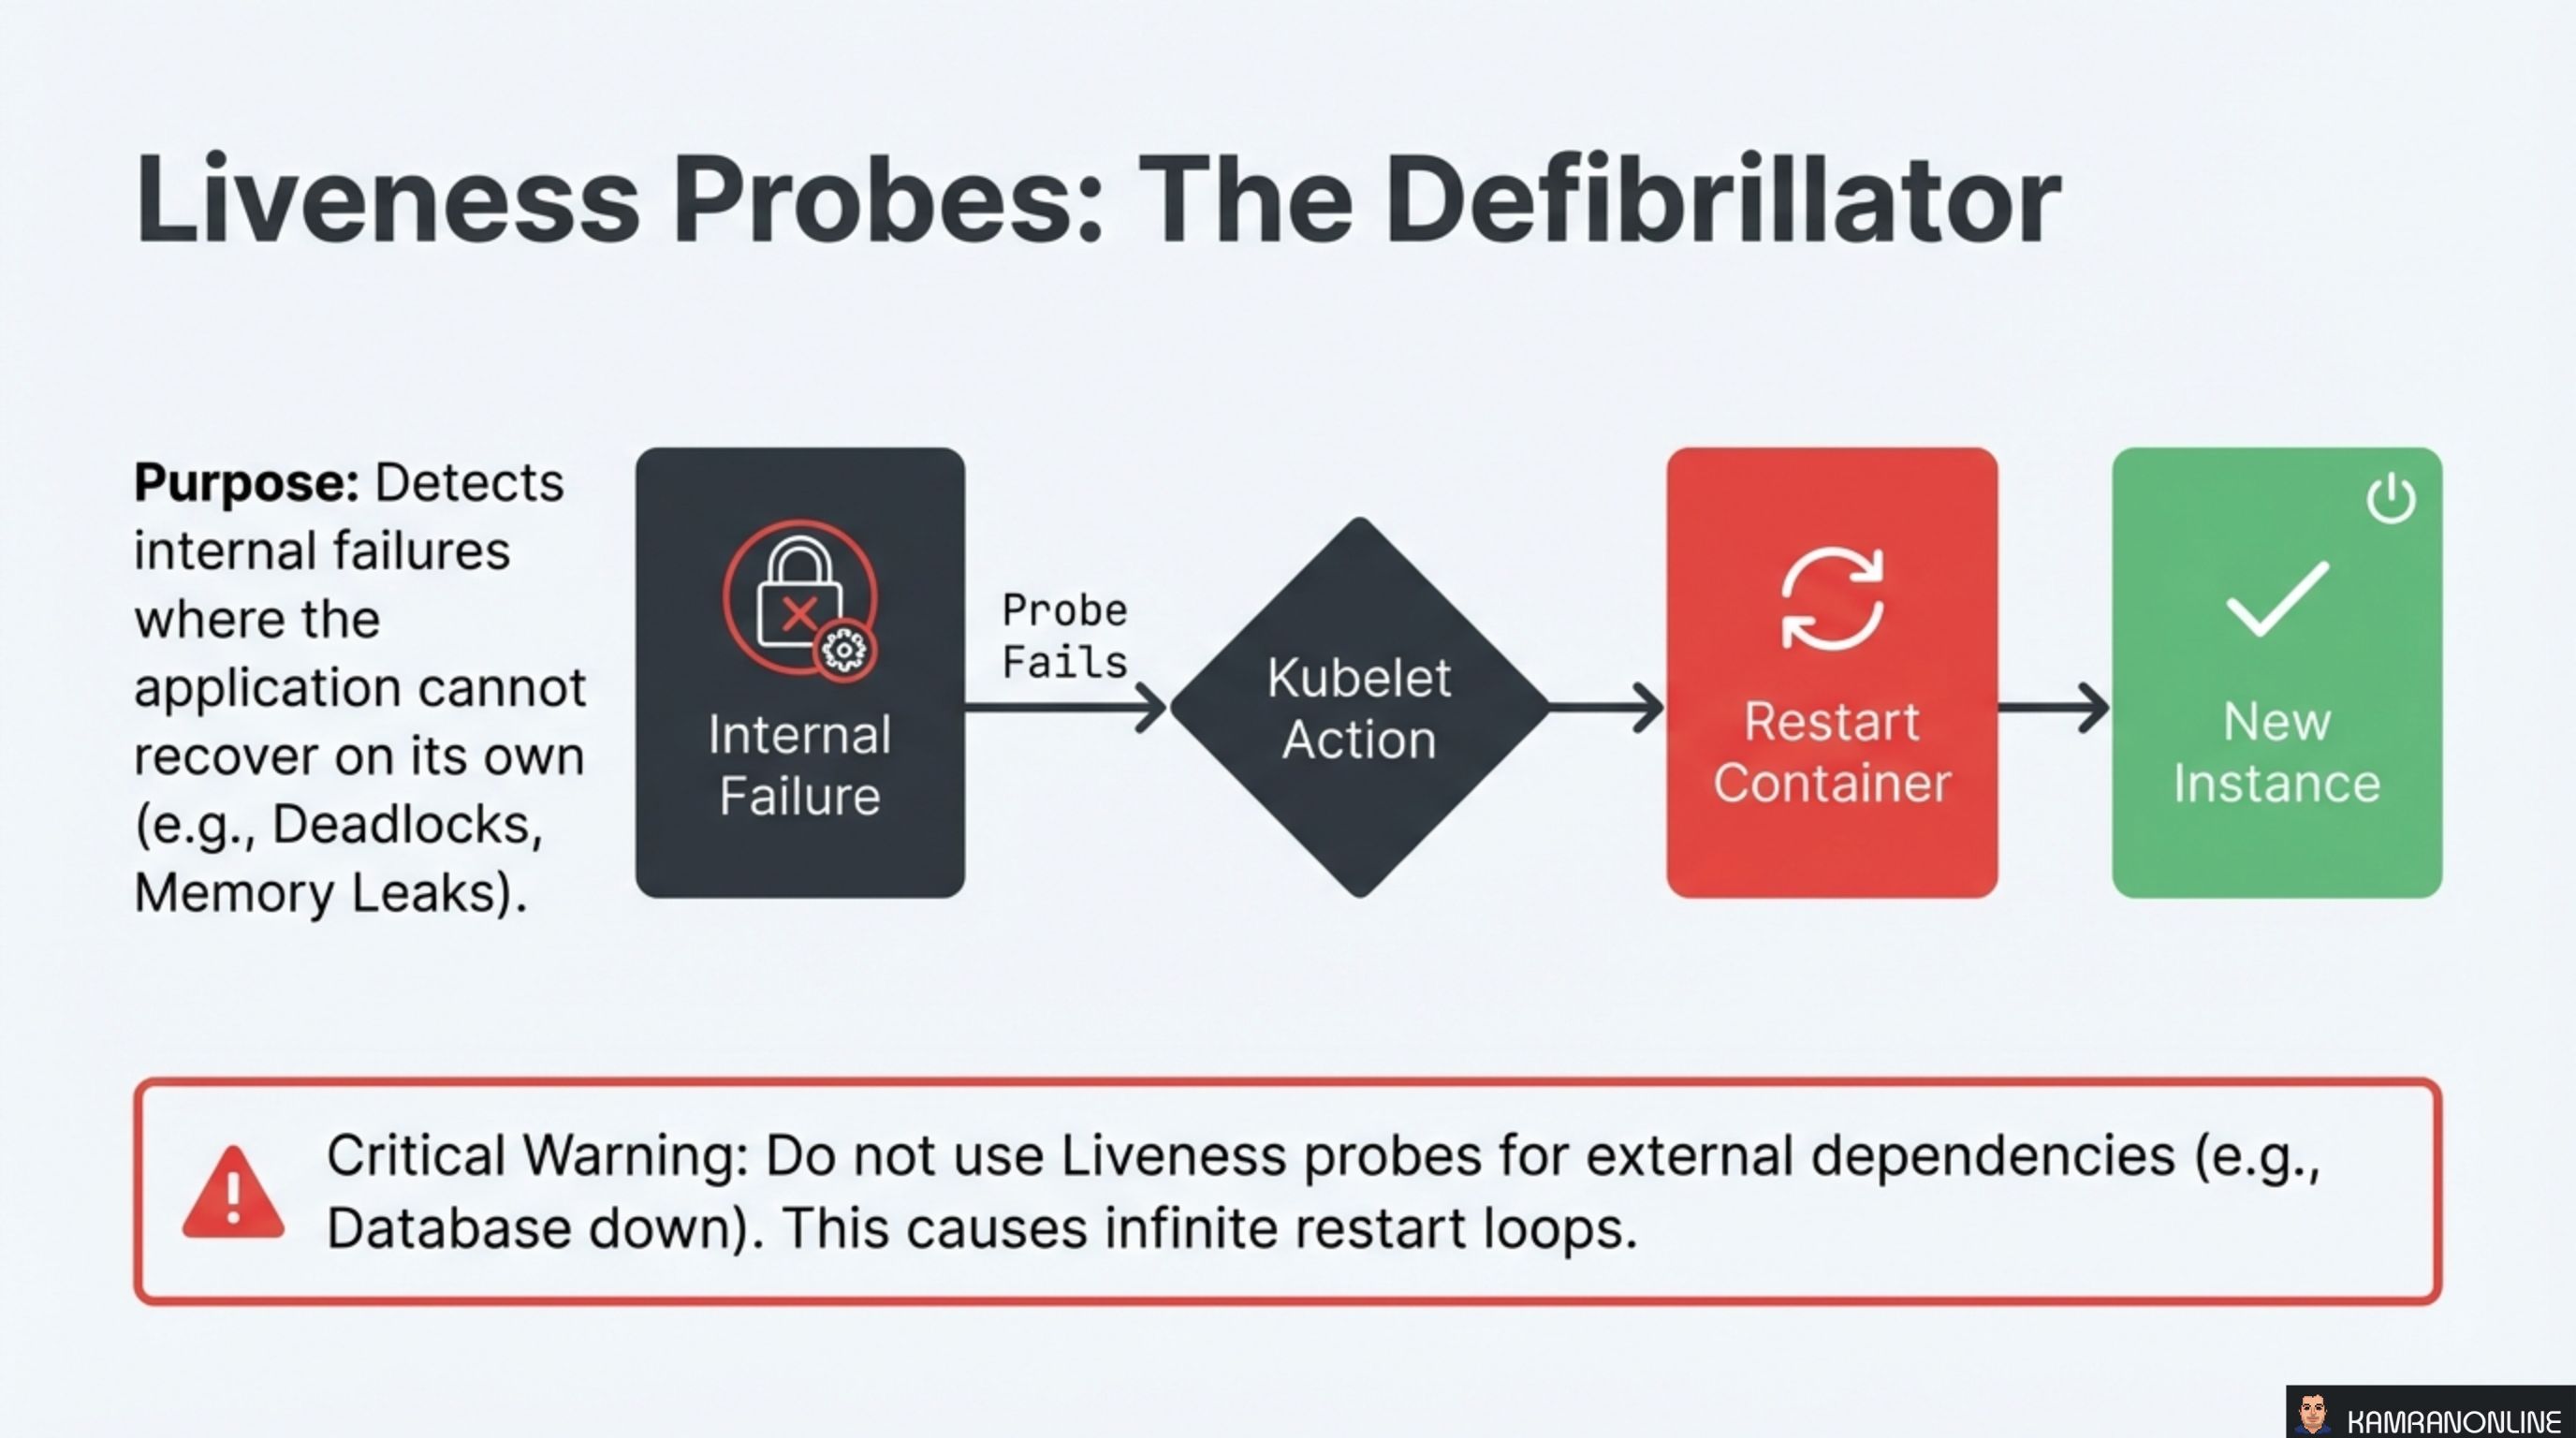
A liveness probe answers one question: is this process fundamentally broken and unable to recover on its own?
The flow is straightforward:
- An internal failure occurs (deadlock, memory leak, corrupted state)
- The liveness probe fails
- The kubelet detects the failure
- The container is restarted — killed and replaced with a fresh instance
This is the nuclear option. Restarting is the right response when the process is irrecoverably broken.
Critical Warning: Do not use liveness probes for external dependencies (e.g., database down). If your liveness probe checks a database connection and the database goes offline, Kubernetes will restart every pod in the deployment — repeatedly — creating an infinite restart loop that amplifies a partial outage into a total one.
Liveness probes should only check things internal to the application: can it respond to a basic request, is the main thread alive, are critical internal systems functioning.
Readiness Probes: The Traffic Cop
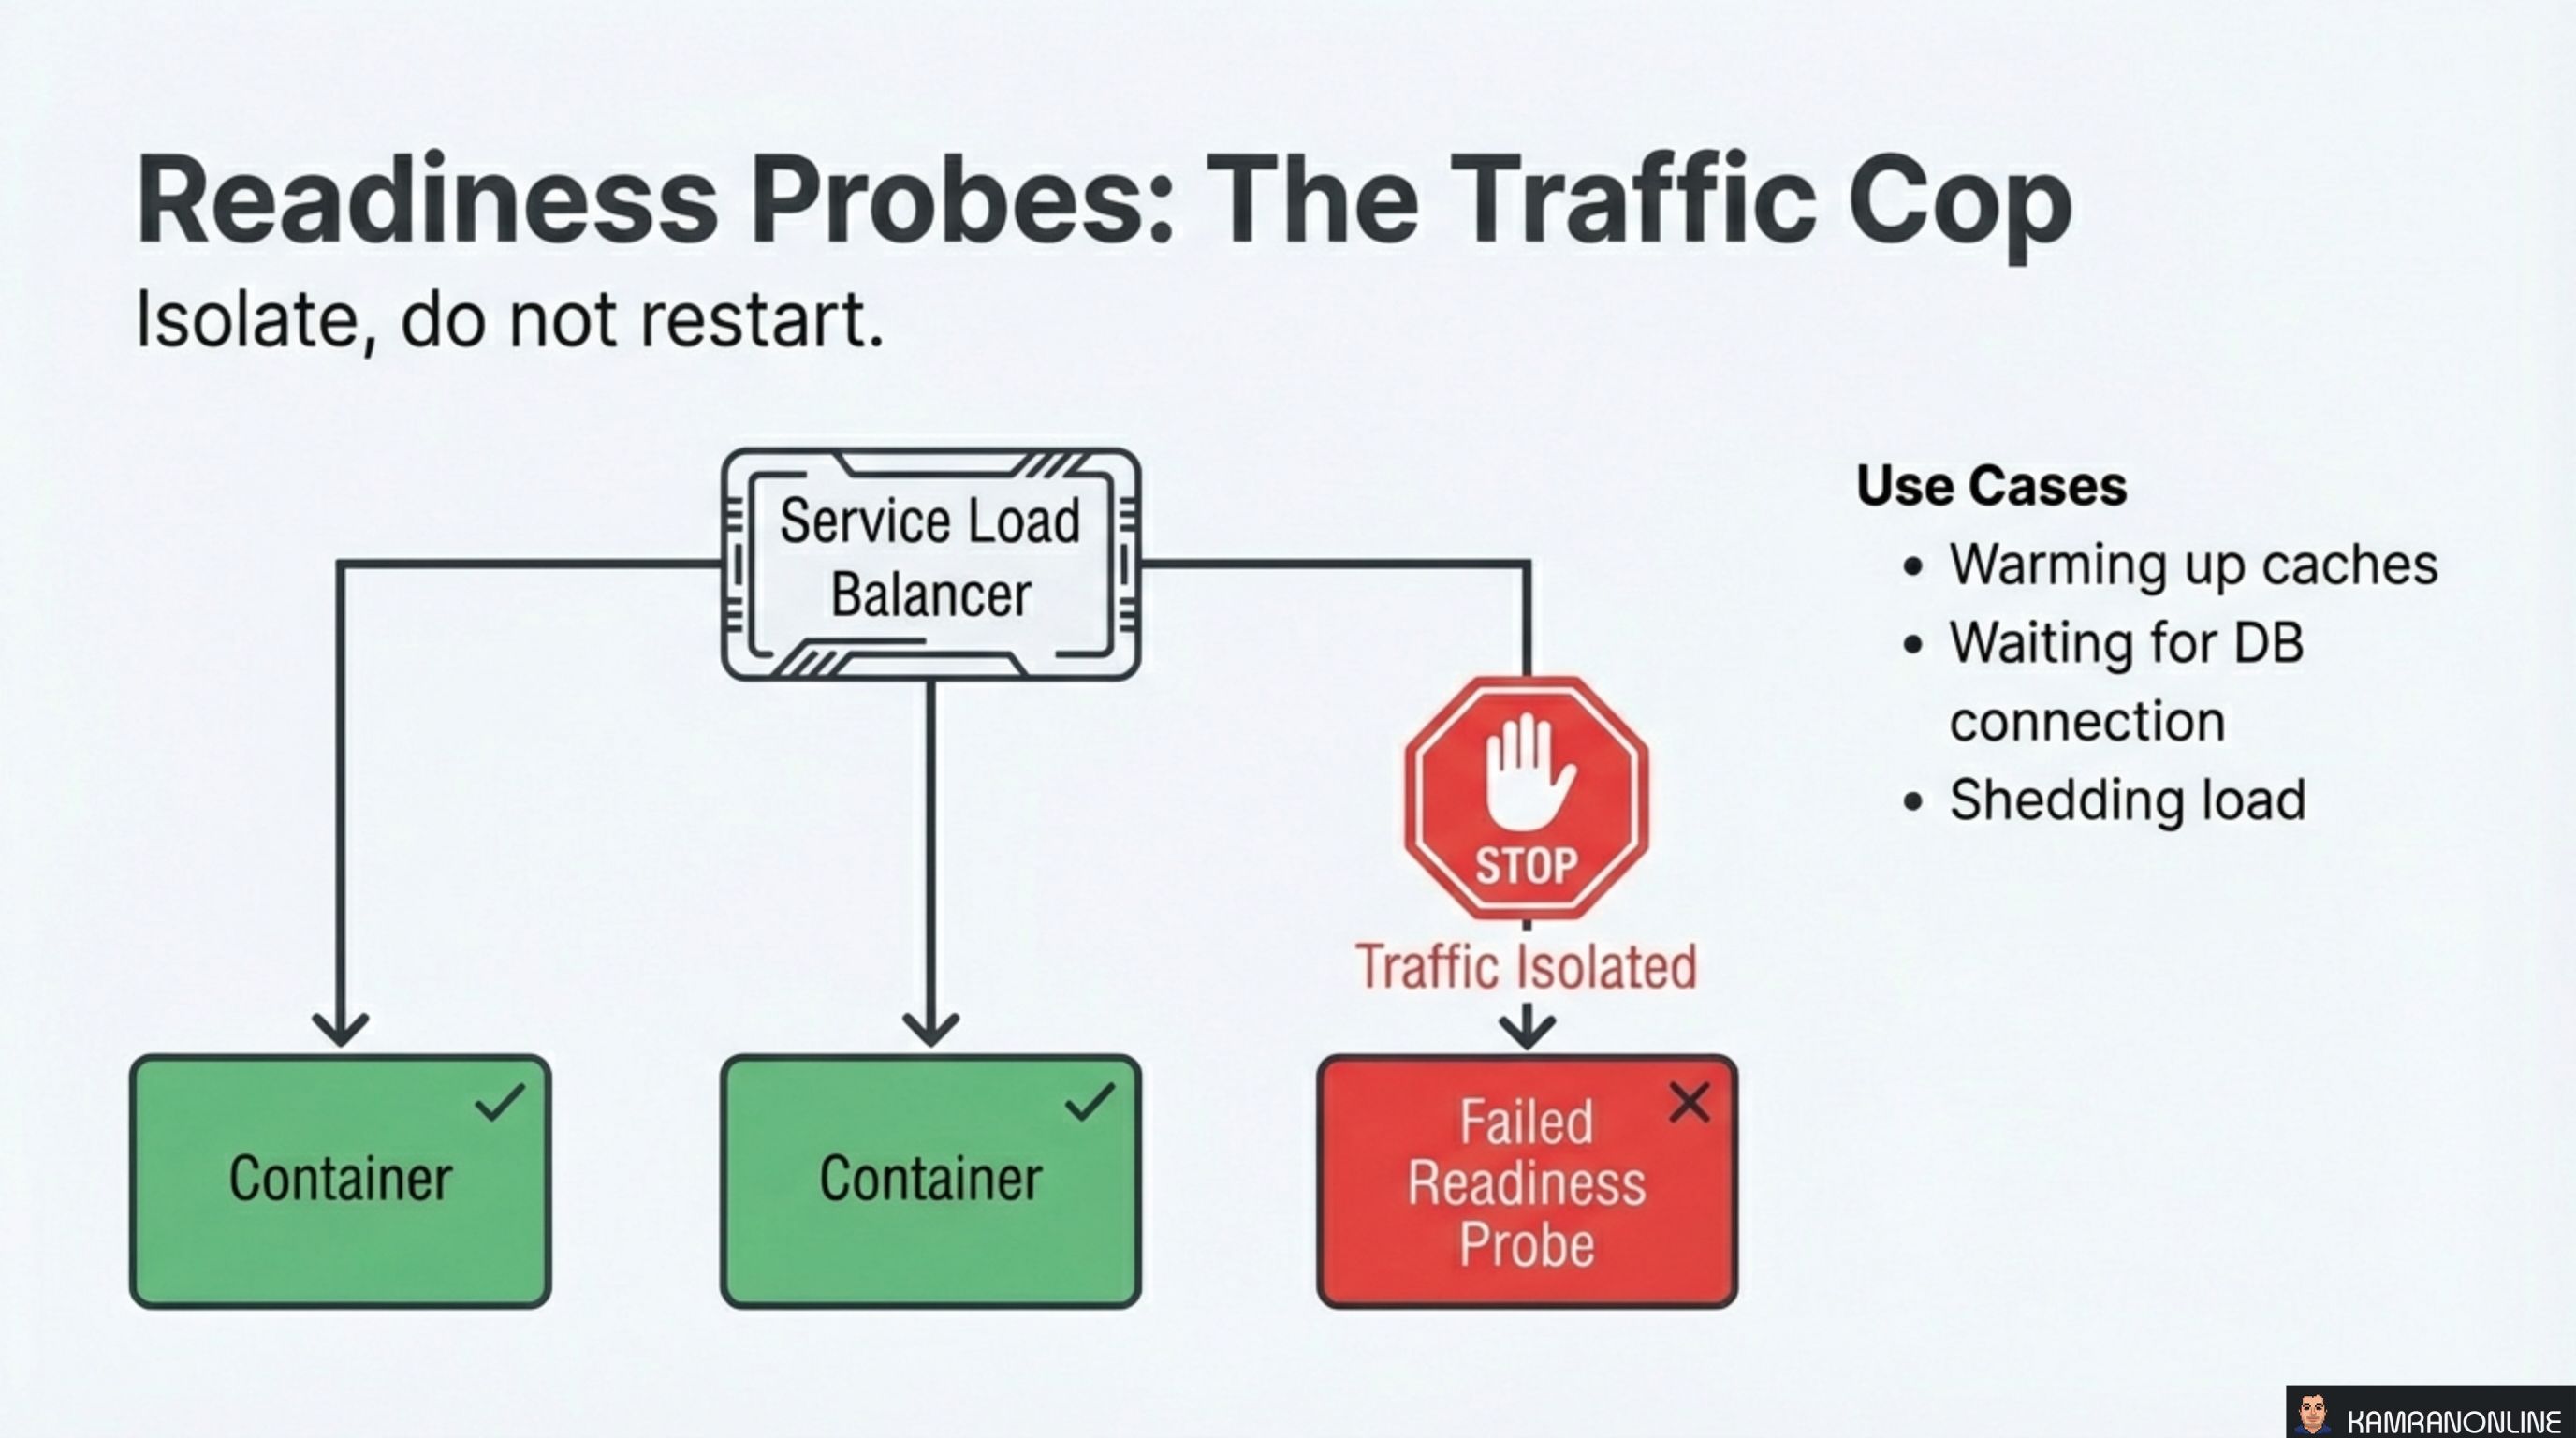
A readiness probe answers a different question: can this pod handle requests right now?
The key difference from liveness: readiness failures isolate, they do not restart. When a readiness probe fails, Kubernetes removes the pod from the Service’s endpoint list. The pod stays running — it just stops receiving traffic until it reports ready again.
Use cases for readiness probes:
- Warming up caches — the application is live but not yet performant enough to serve traffic
- Waiting for DB connection — the database pool is still initializing
- Shedding load — the pod is overwhelmed and temporarily signals “not ready” to shed traffic to healthier instances
This is where you check external dependencies. If the database is down, readiness probes pull pods out of rotation gracefully — no restarts, no cascade failures.
Startup Probes: The Protector
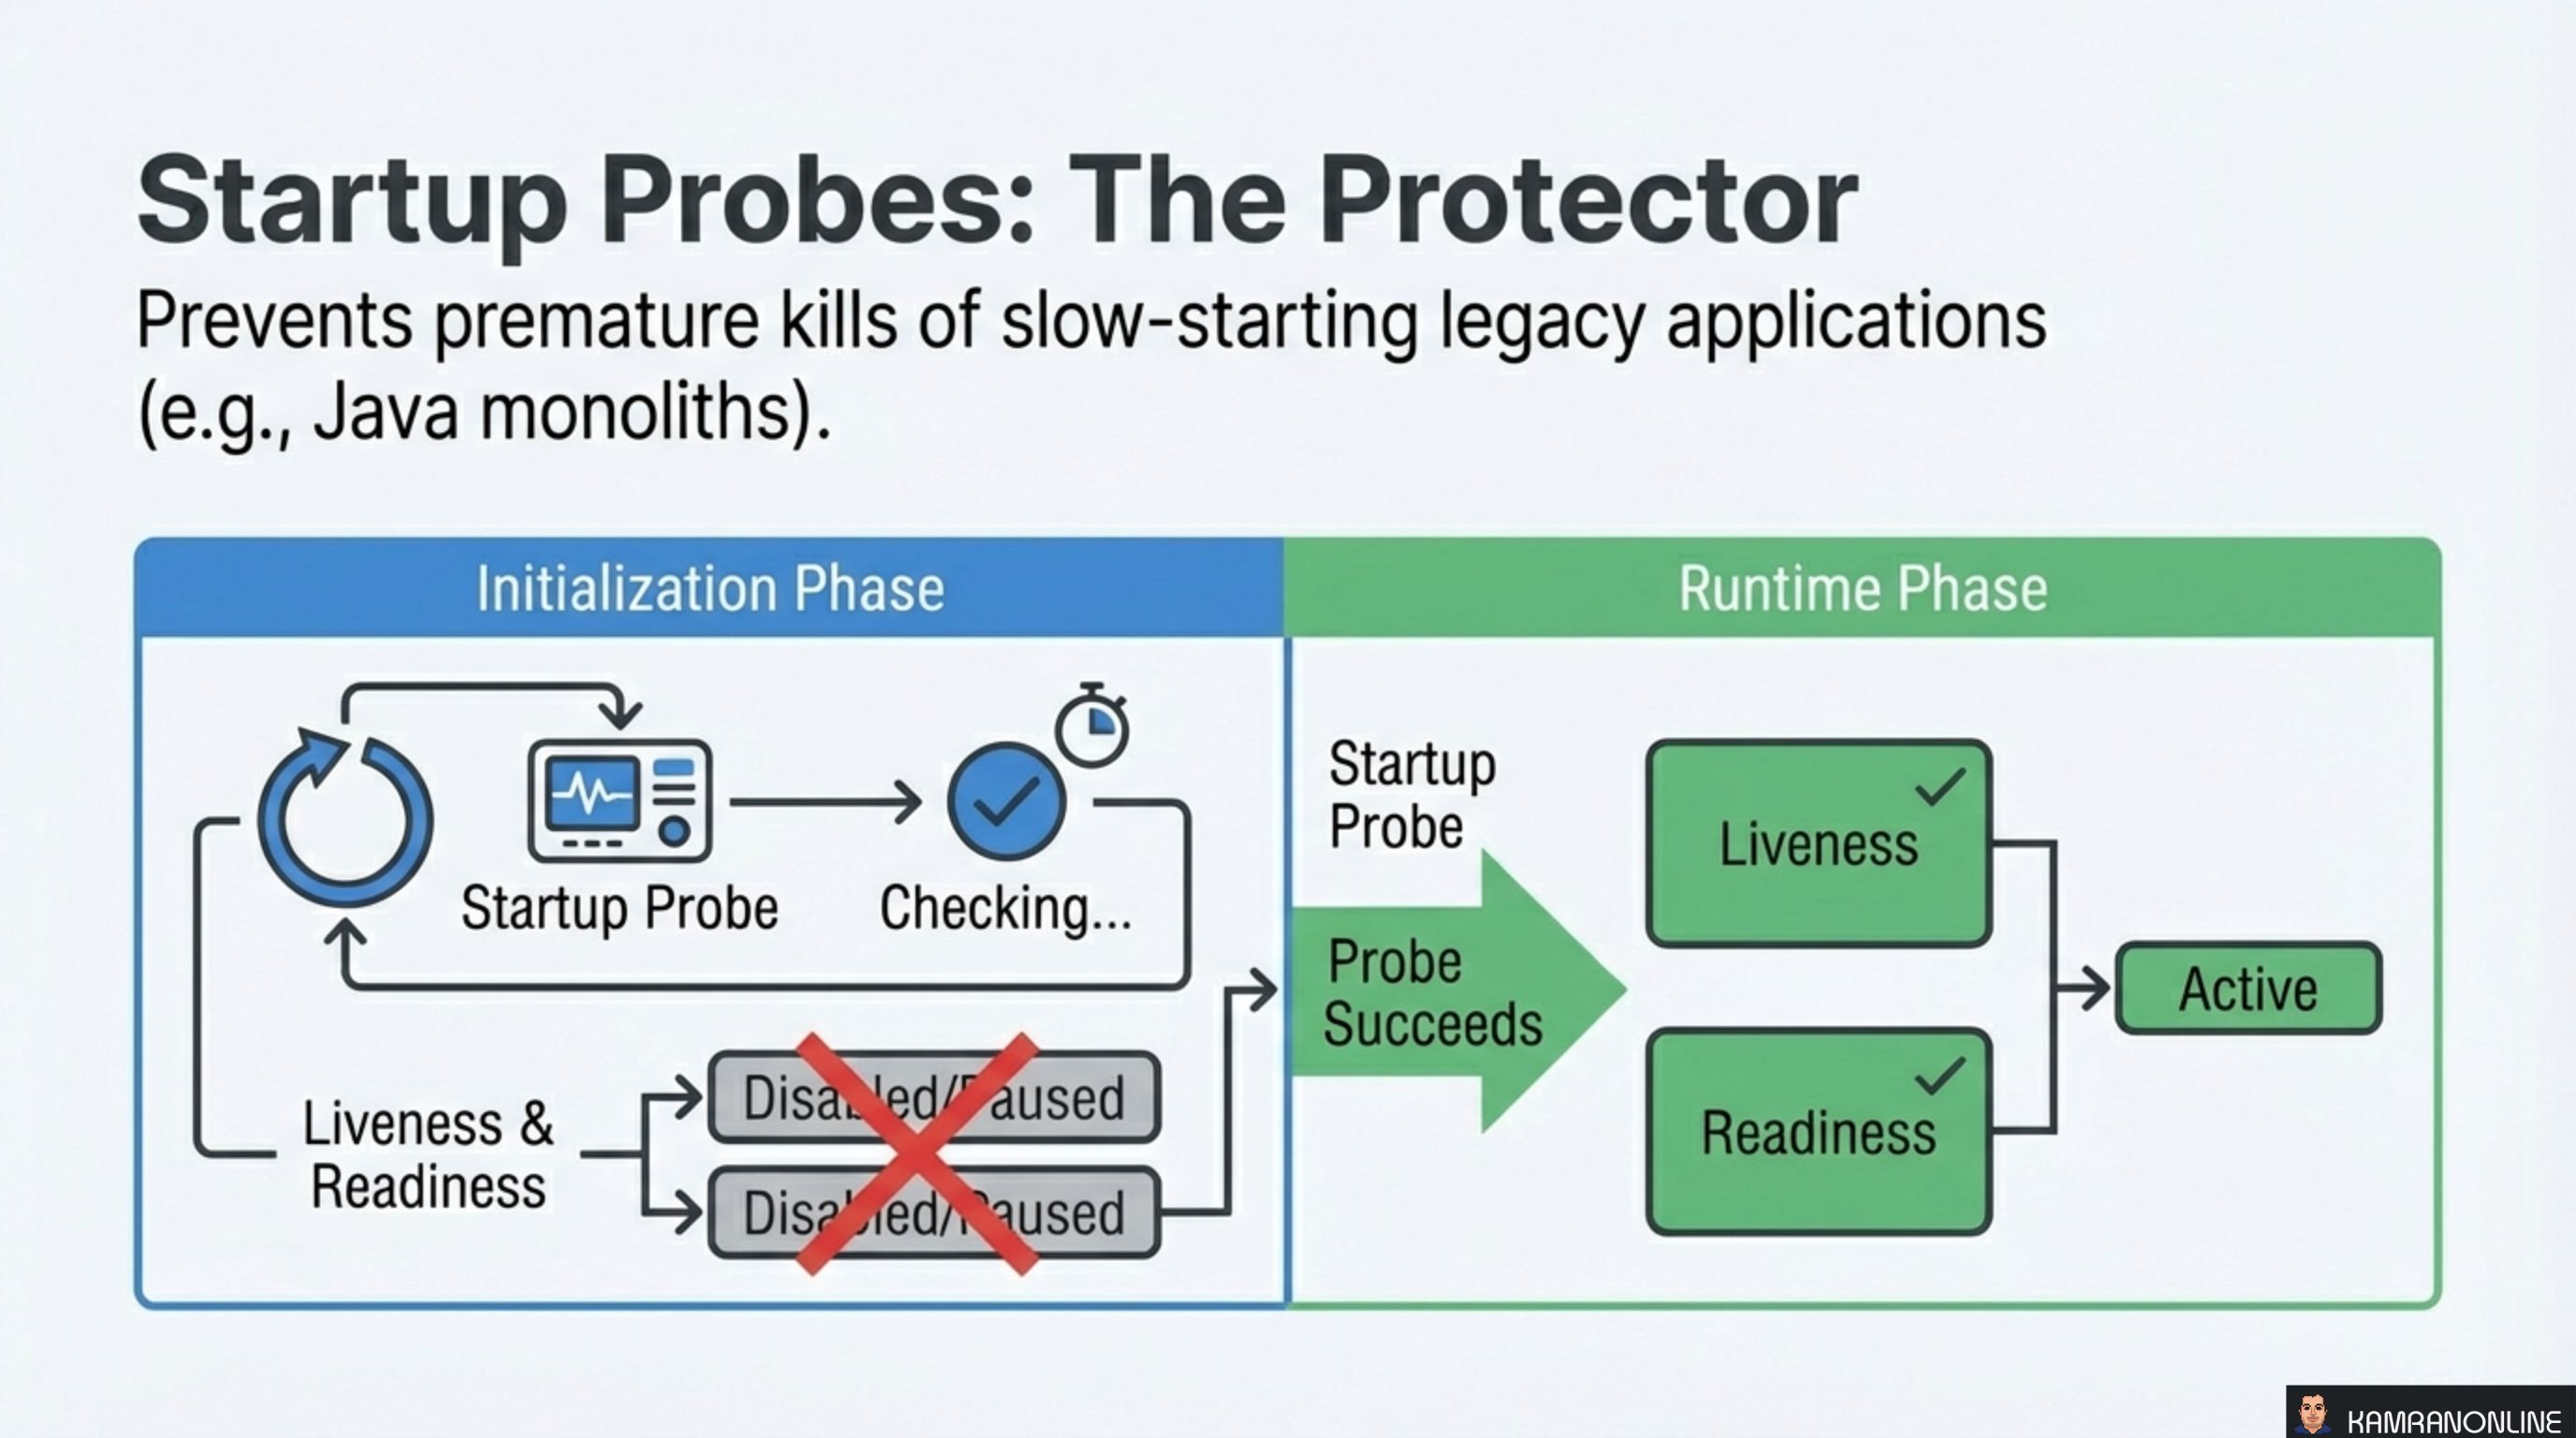
Startup probes solve a specific timing problem: slow-starting applications that would be killed by liveness probes before they finish initializing.
Java monoliths, legacy applications loading large datasets, or services running database migrations at boot can take minutes to start. Without a startup probe, you’d need to set initialDelaySeconds on the liveness probe to something absurdly high — which then means Kubernetes is slow to detect genuine failures during normal operation.
The startup probe separates these concerns:
- During initialization: Only the startup probe runs. Liveness and readiness probes are disabled/paused
- After startup succeeds: The startup probe hands off to liveness and readiness probes, which run with their normal, tight timing
This gives you the best of both worlds — generous boot time without sacrificing fast failure detection at runtime.
Strategy Comparison: Choosing the Right Tool

| Liveness | Readiness | Startup | |
|---|---|---|---|
| Goal | Recover from crash | Flow control | Handle slow init |
| Action | Restart container | Stop sending traffic | Wait (defer others) |
| Consequence | New pod created | Pod isolated (running) | Prevents premature kill |
| Analogy | Defibrillator | Traffic Cop | Protector |
The analogies are useful mnemonics:
- Liveness = Defibrillator — the patient is dying, shock them back to life (restart)
- Readiness = Traffic Cop — the road is temporarily blocked, reroute traffic (isolate)
- Startup = Protector — the patient is still in surgery, don’t declare them dead yet (wait)
Probe Methods: The Languages of Health
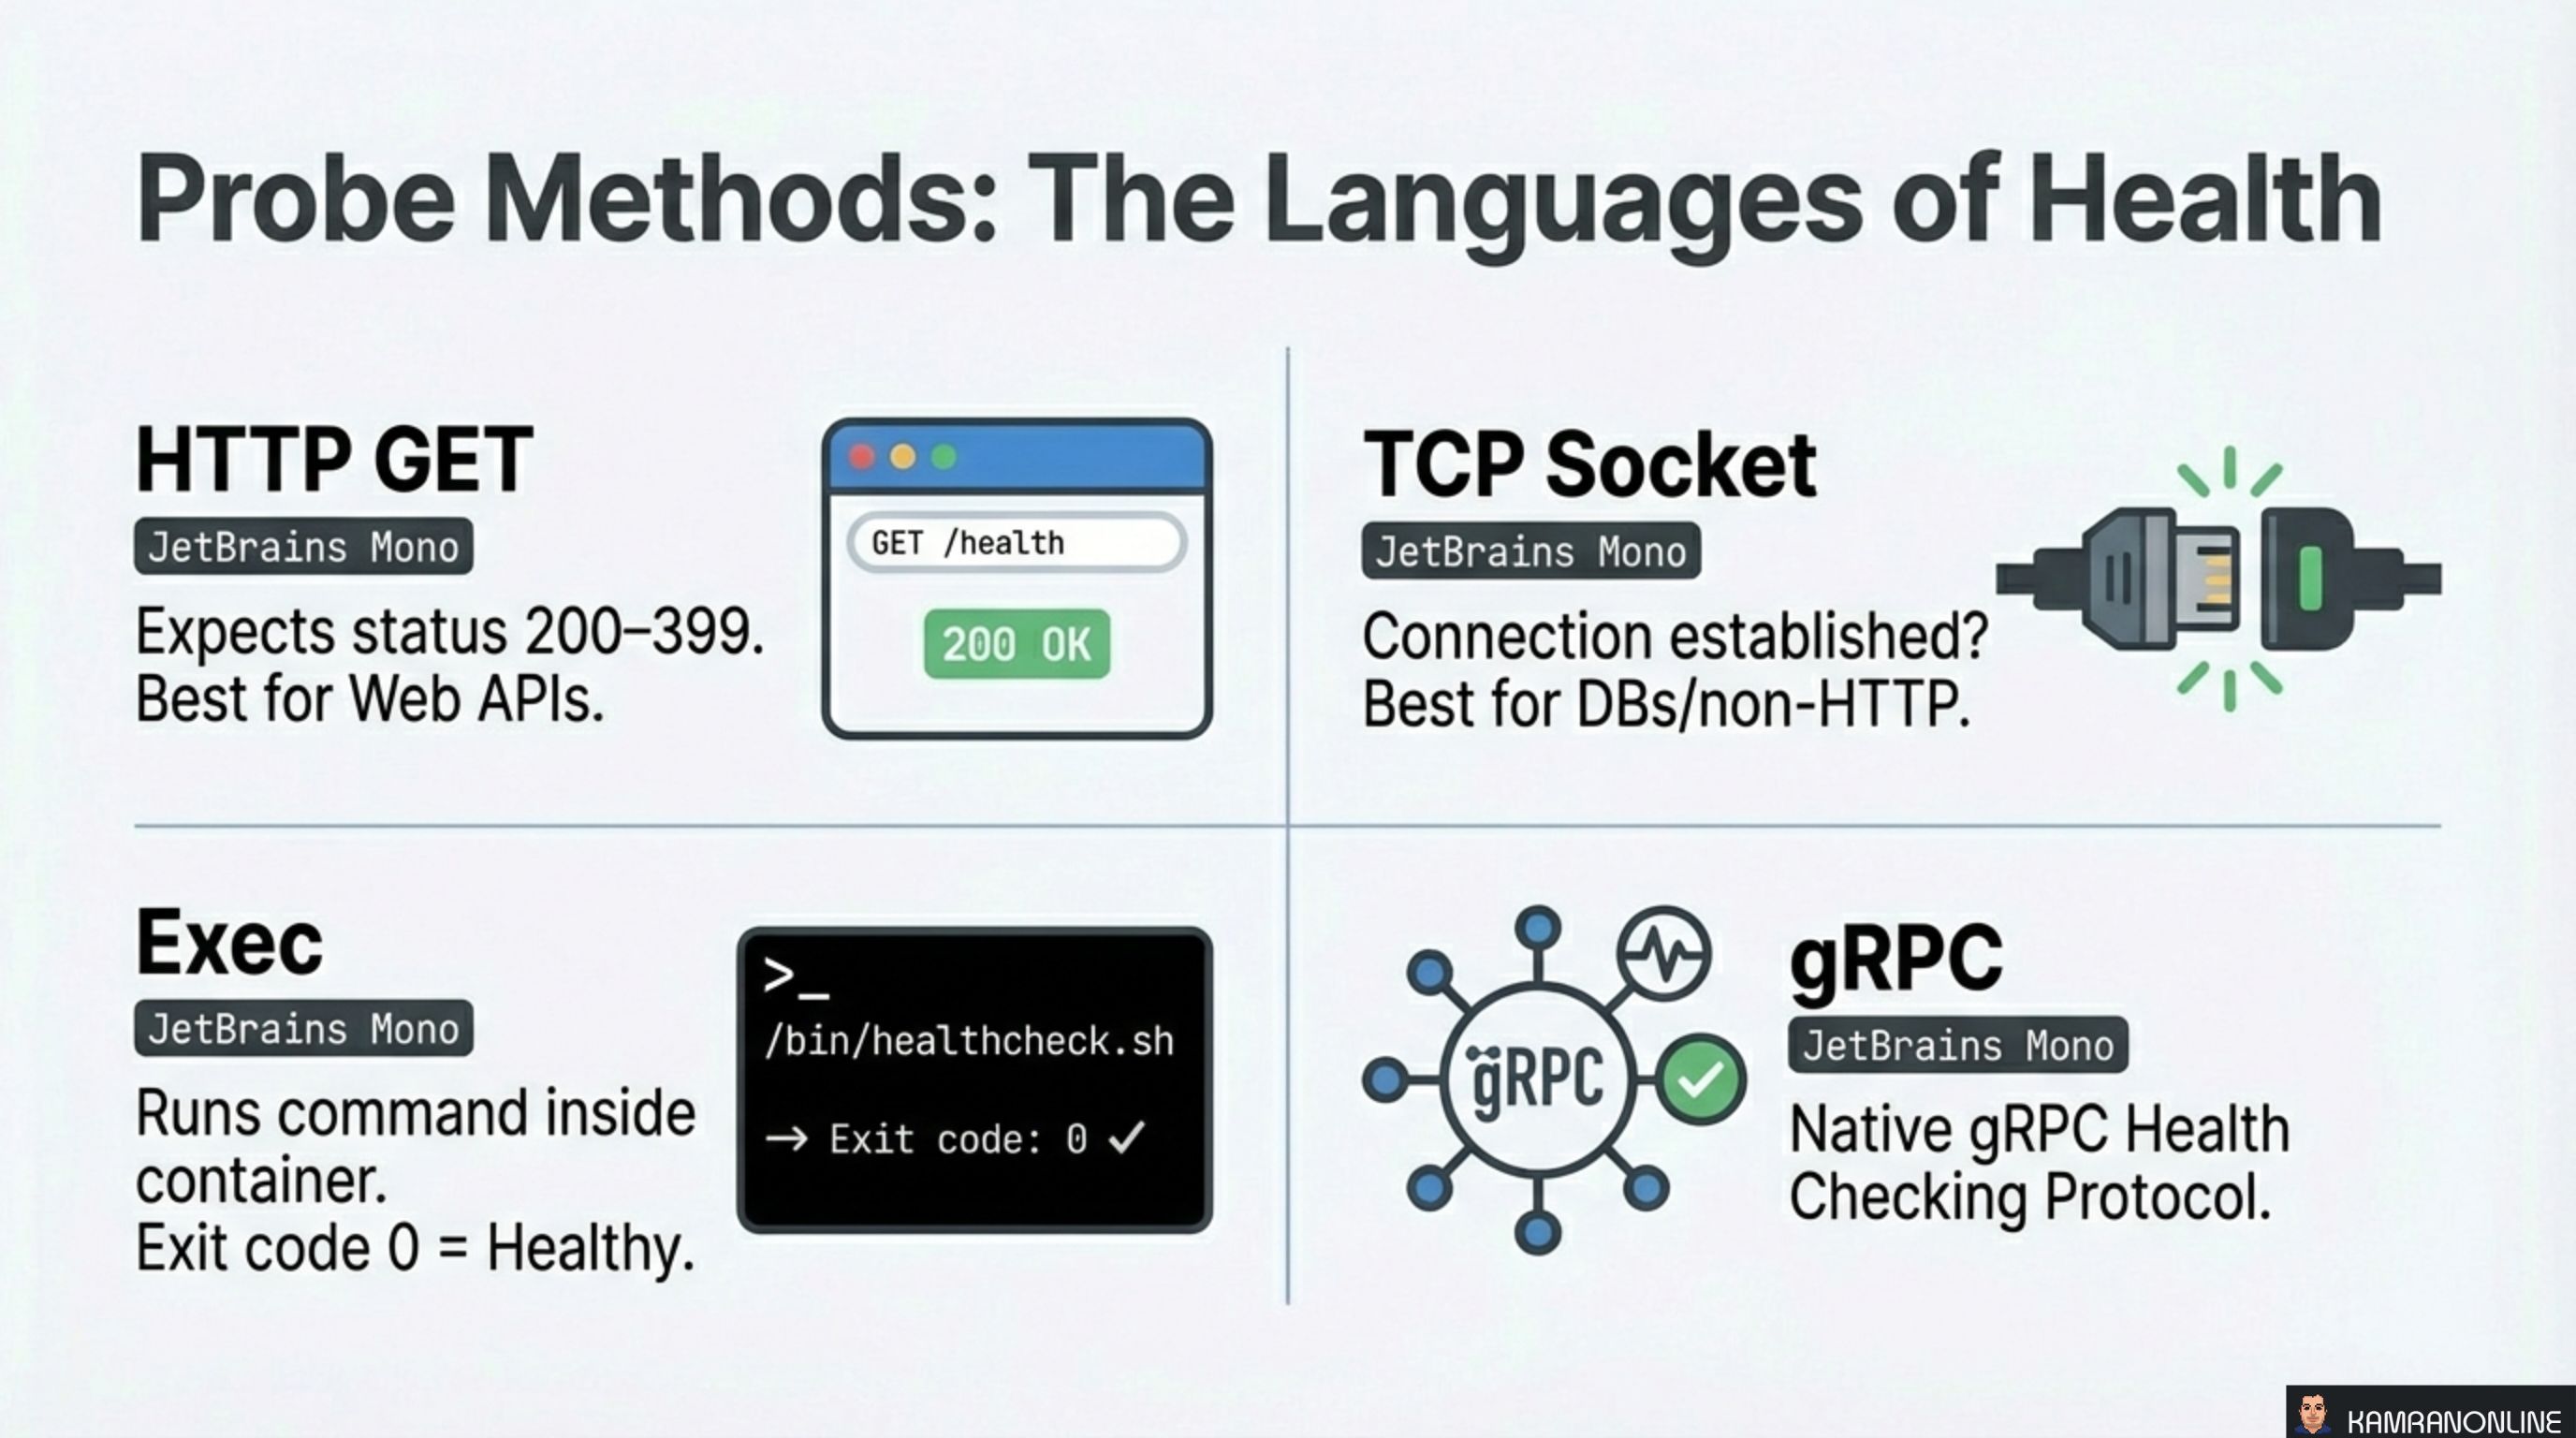
Kubernetes supports four mechanisms for executing probes:
HTTP GET
Performs an HTTP GET request against the container. Any status code between 200–399 is healthy. Best for web APIs and applications that already expose HTTP endpoints.
TCP Socket
Attempts to open a TCP connection to a specified port. If the connection is established, the probe passes. Best for databases and non-HTTP services where you just need to know the port is accepting connections.
Exec
Runs a command inside the container. Exit code 0 means healthy, anything else means failure. Most flexible option — you can write custom health check scripts that verify internal state.
gRPC
Uses the native gRPC Health Checking Protocol. The container must implement the standard gRPC health service. Best for gRPC-native microservices.
Key Configuration: Tuning the Knobs
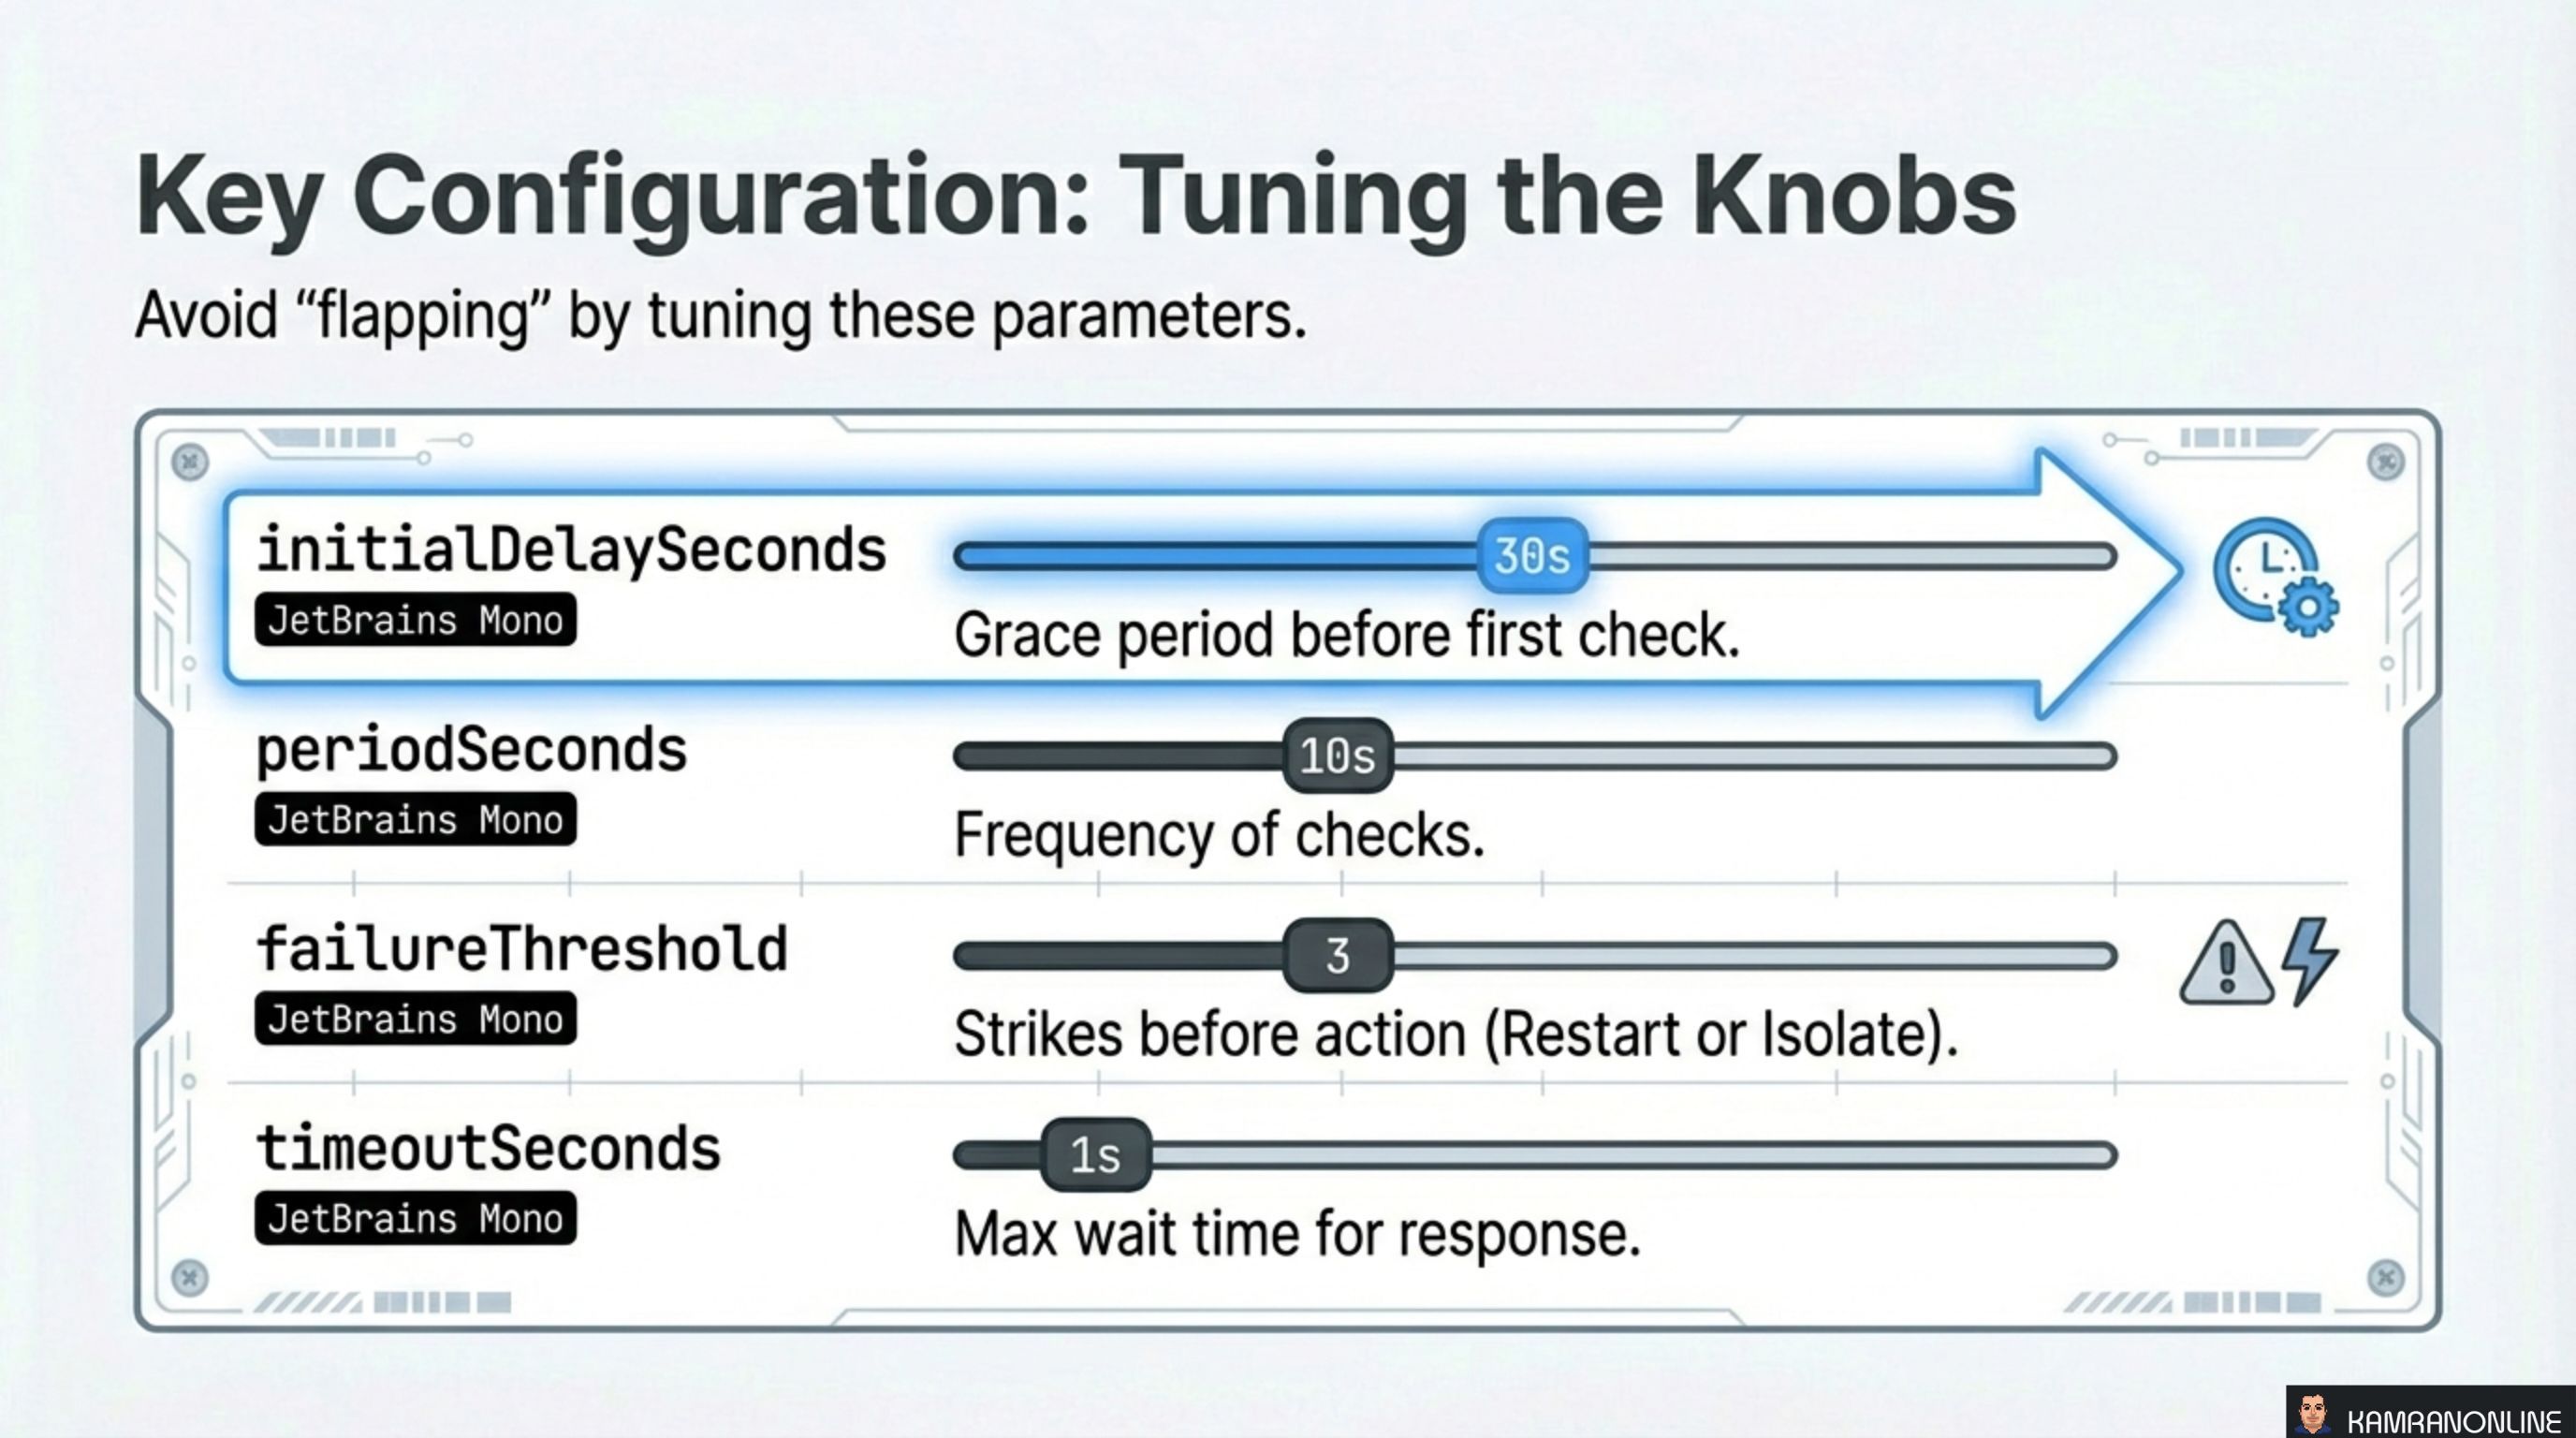
Four parameters control probe behaviour. Getting these wrong causes “flapping” — pods that cycle between healthy and unhealthy states:
| Parameter | Default | Purpose |
|---|---|---|
initialDelaySeconds | 0 | Grace period before the first check. Set this high enough for your app to boot |
periodSeconds | 10 | How often the probe runs. Lower values detect failures faster but add overhead |
failureThreshold | 3 | Number of consecutive failures before action is taken. Prevents one slow response from triggering a restart |
timeoutSeconds | 1 | Max time to wait for a probe response. If your health endpoint sometimes takes 2 seconds, a 1-second timeout will cause false failures |
The formula for maximum startup time is: initialDelaySeconds + (periodSeconds × failureThreshold). For a startup probe with initialDelaySeconds: 60, periodSeconds: 60, and failureThreshold: 15, that gives 15 minutes of initialization time.
Implementation: Liveness Configuration
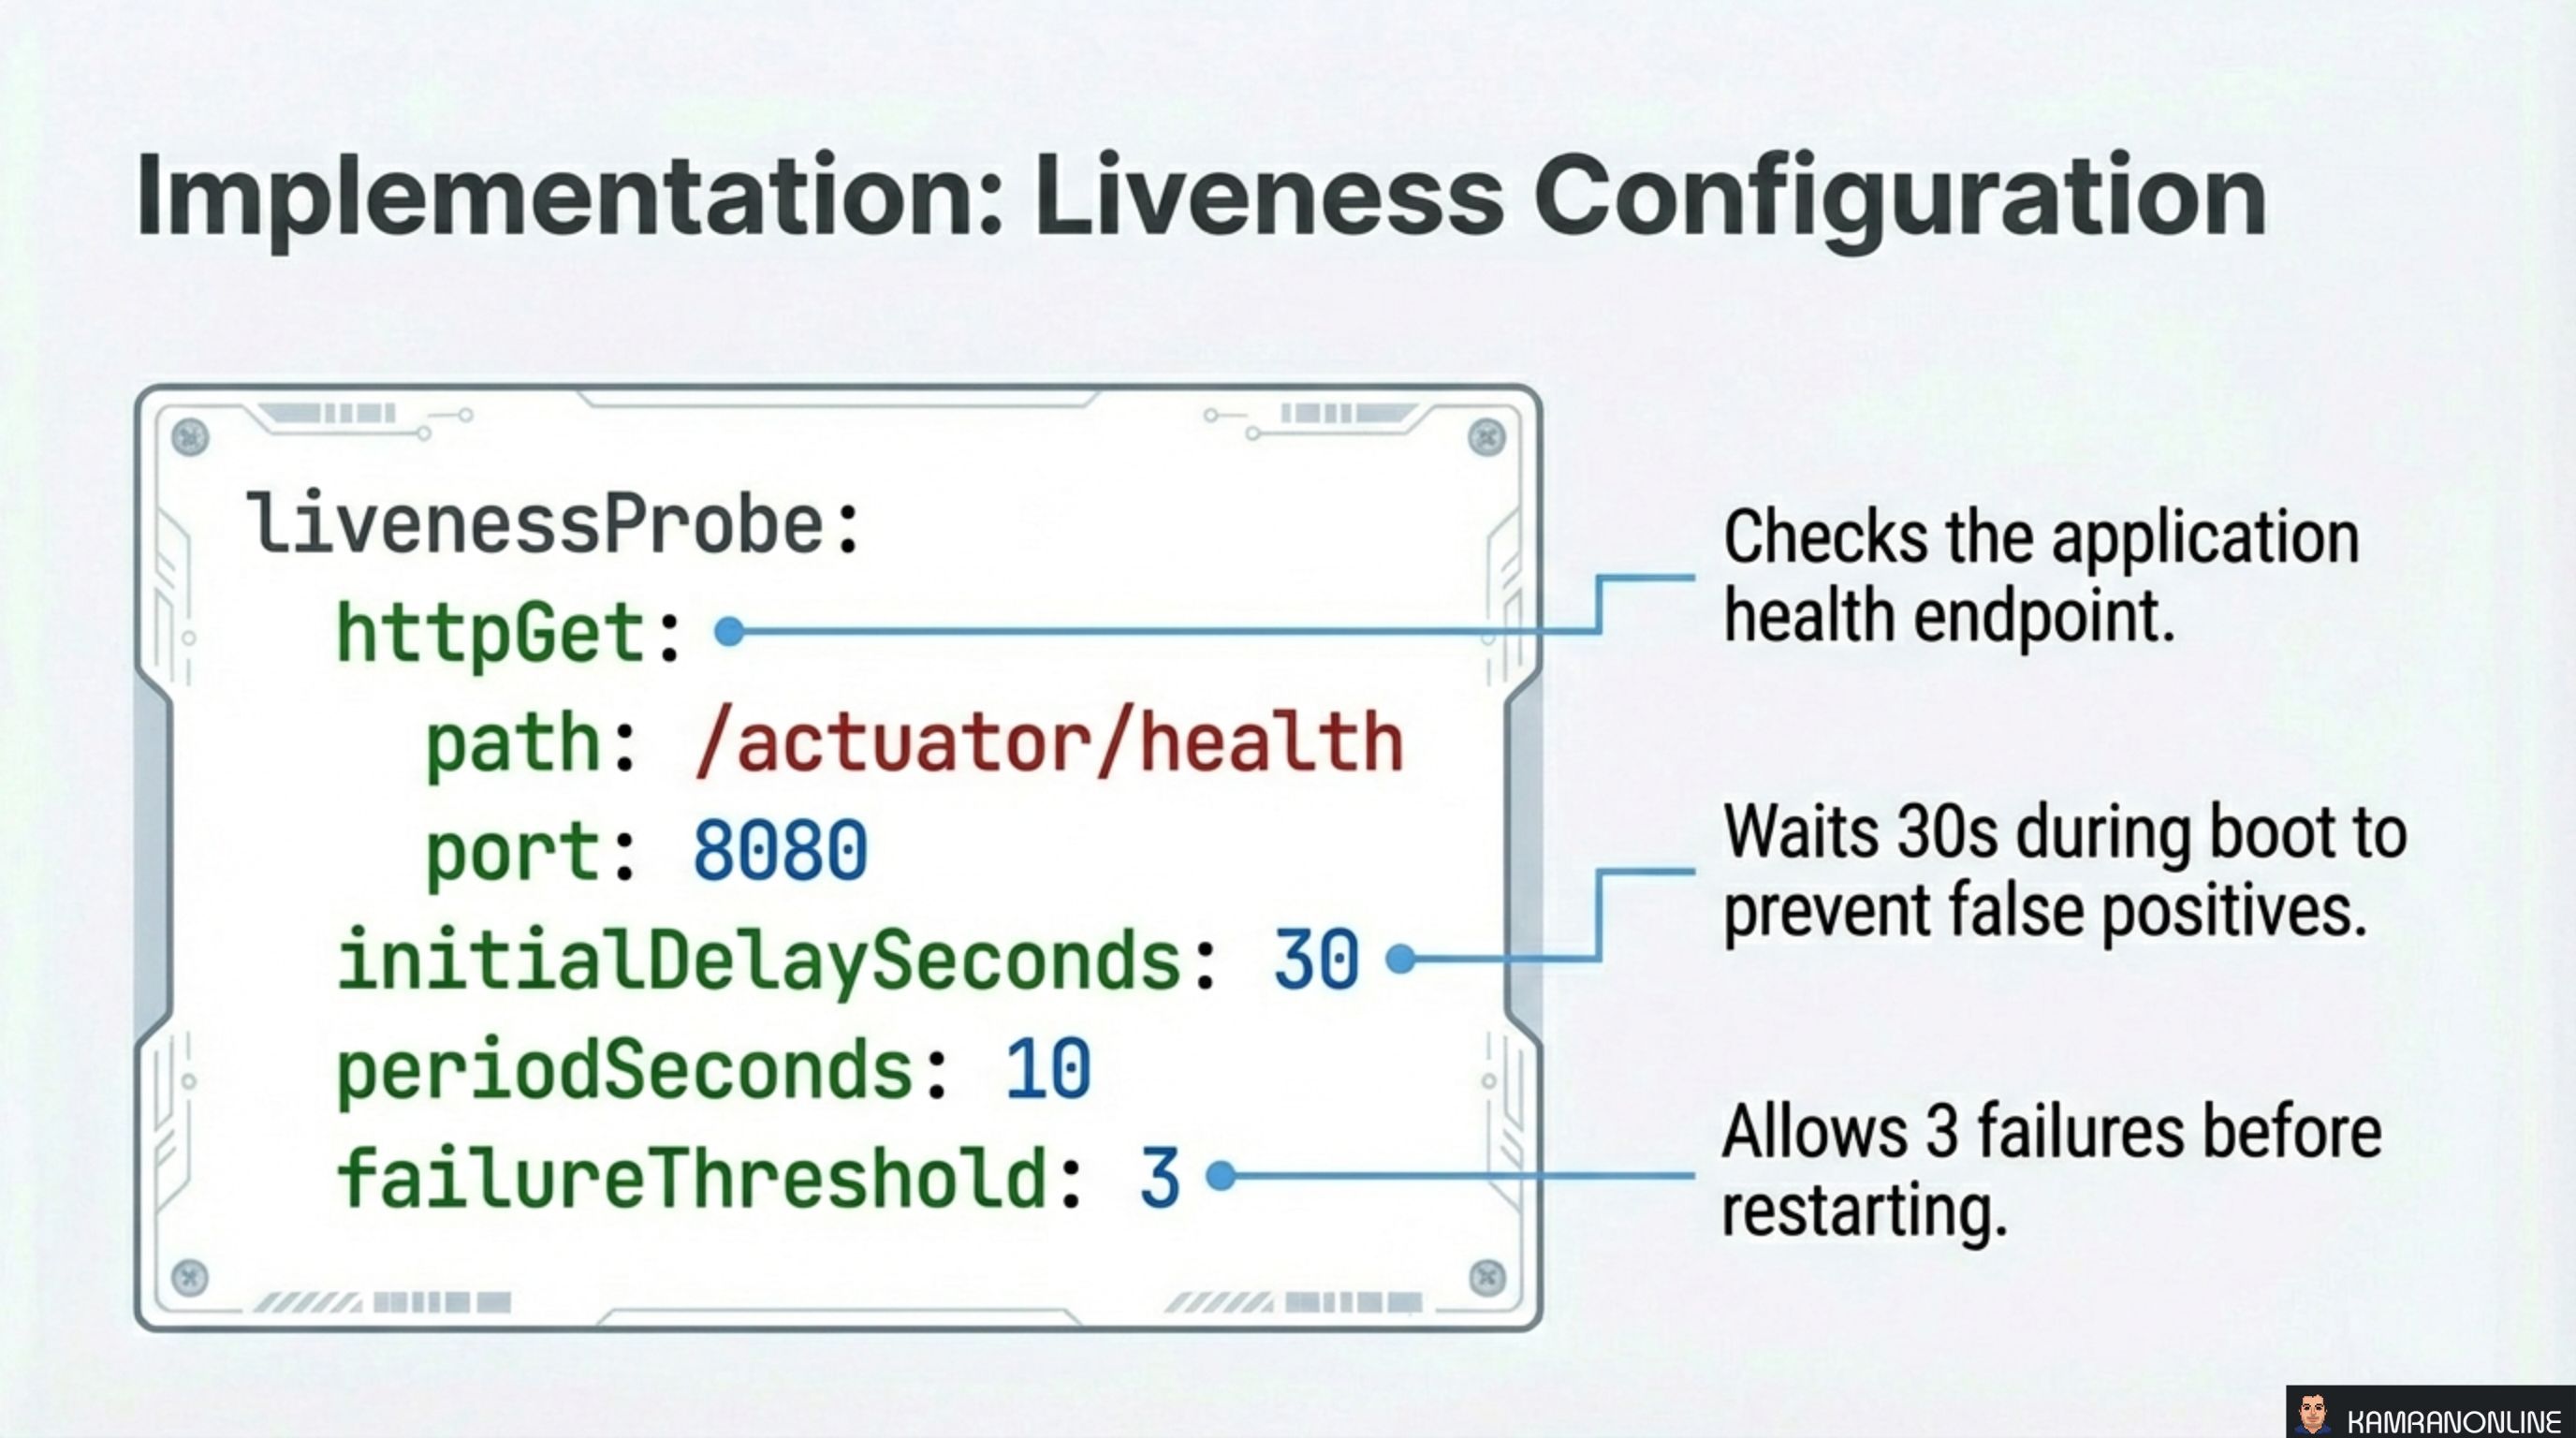
A typical liveness probe for a Spring Boot application:
livenessProbe:
  httpGet:
    path: /actuator/health
    port: 8080
  initialDelaySeconds: 30
  periodSeconds: 10
  failureThreshold: 3
This configuration:
- Checks the application health endpoint via HTTP GET
- Waits 30 seconds during boot to prevent false positives
- Checks every 10 seconds during normal operation
- Allows 3 consecutive failures before restarting — so the pod gets 30 seconds of grace after the first failure
Implementation: Readiness and Startup
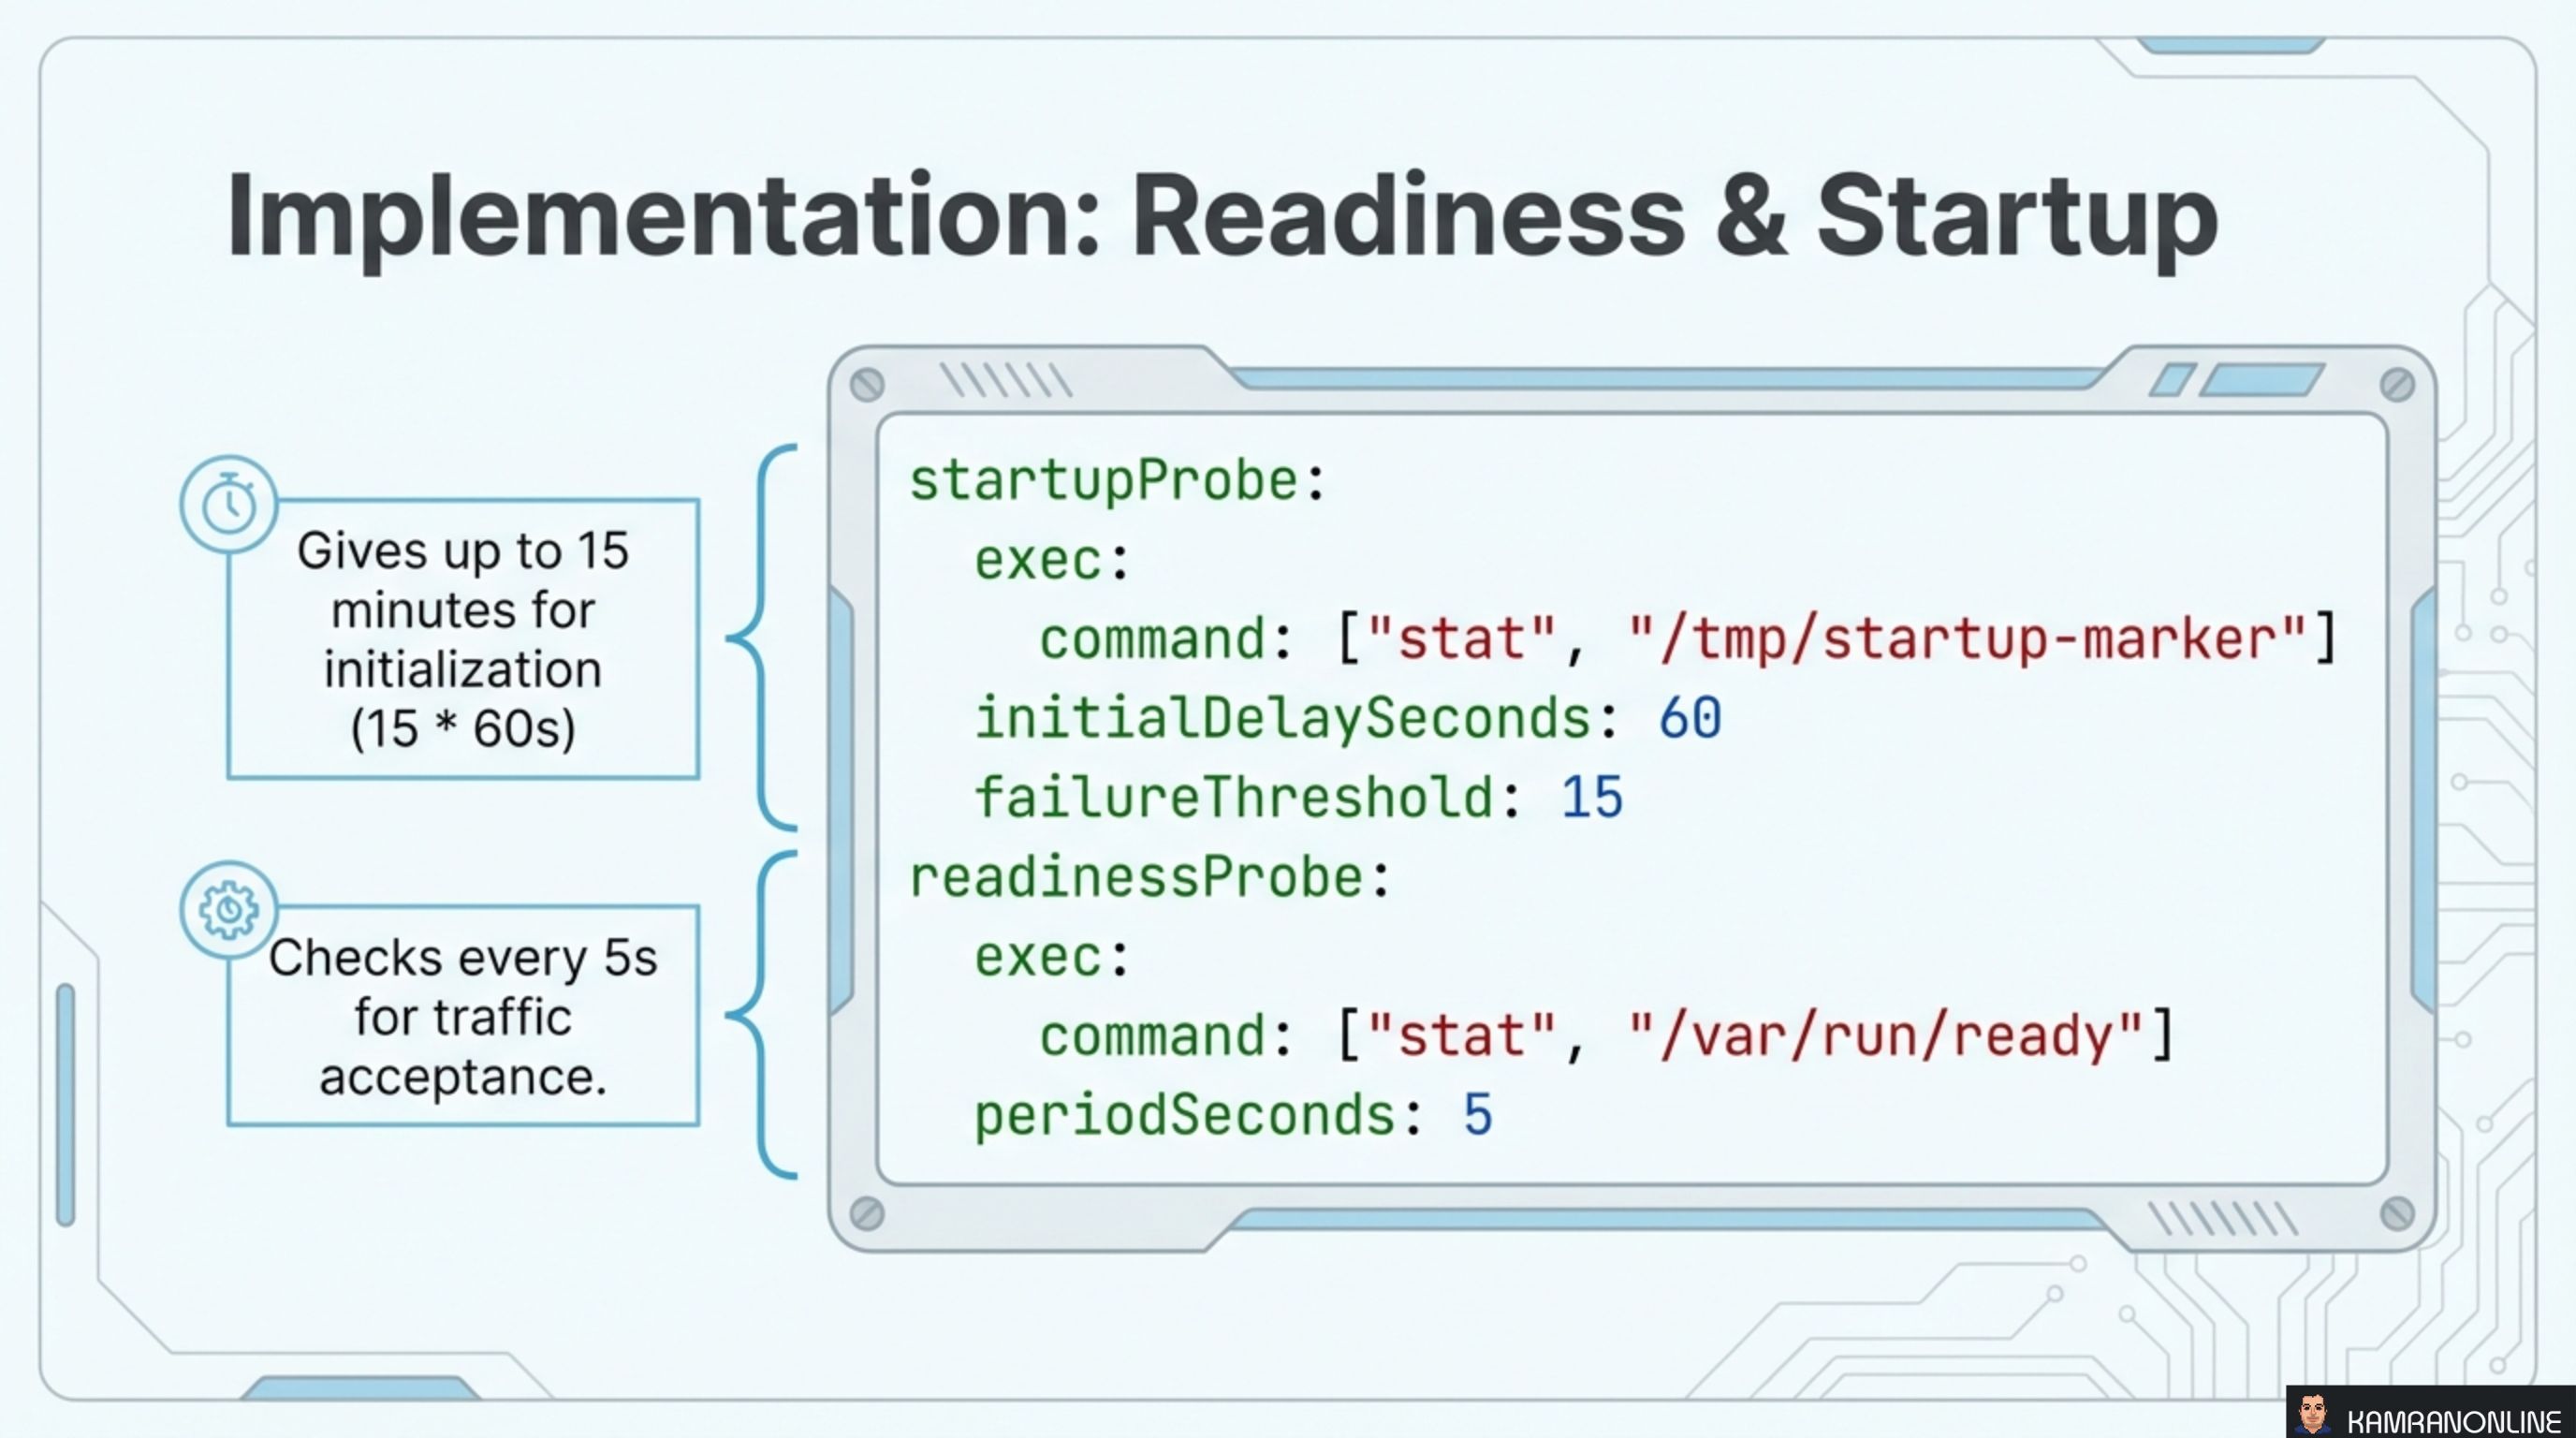
Combining startup and readiness probes for a slow-starting application:
startupProbe:
  exec:
    command: ["stat", "/tmp/startup-marker"]
  initialDelaySeconds: 60
  failureThreshold: 15
readinessProbe:
  exec:
    command: ["stat", "/var/run/ready"]
  periodSeconds: 5
The startup probe checks for a marker file that the application creates when initialization is complete. With initialDelaySeconds: 60 and failureThreshold: 15, this gives up to 15 minutes for the application to boot.
The readiness probe uses a separate marker file and checks every 5 seconds to determine whether the pod should receive traffic.
Summary and Best Practices
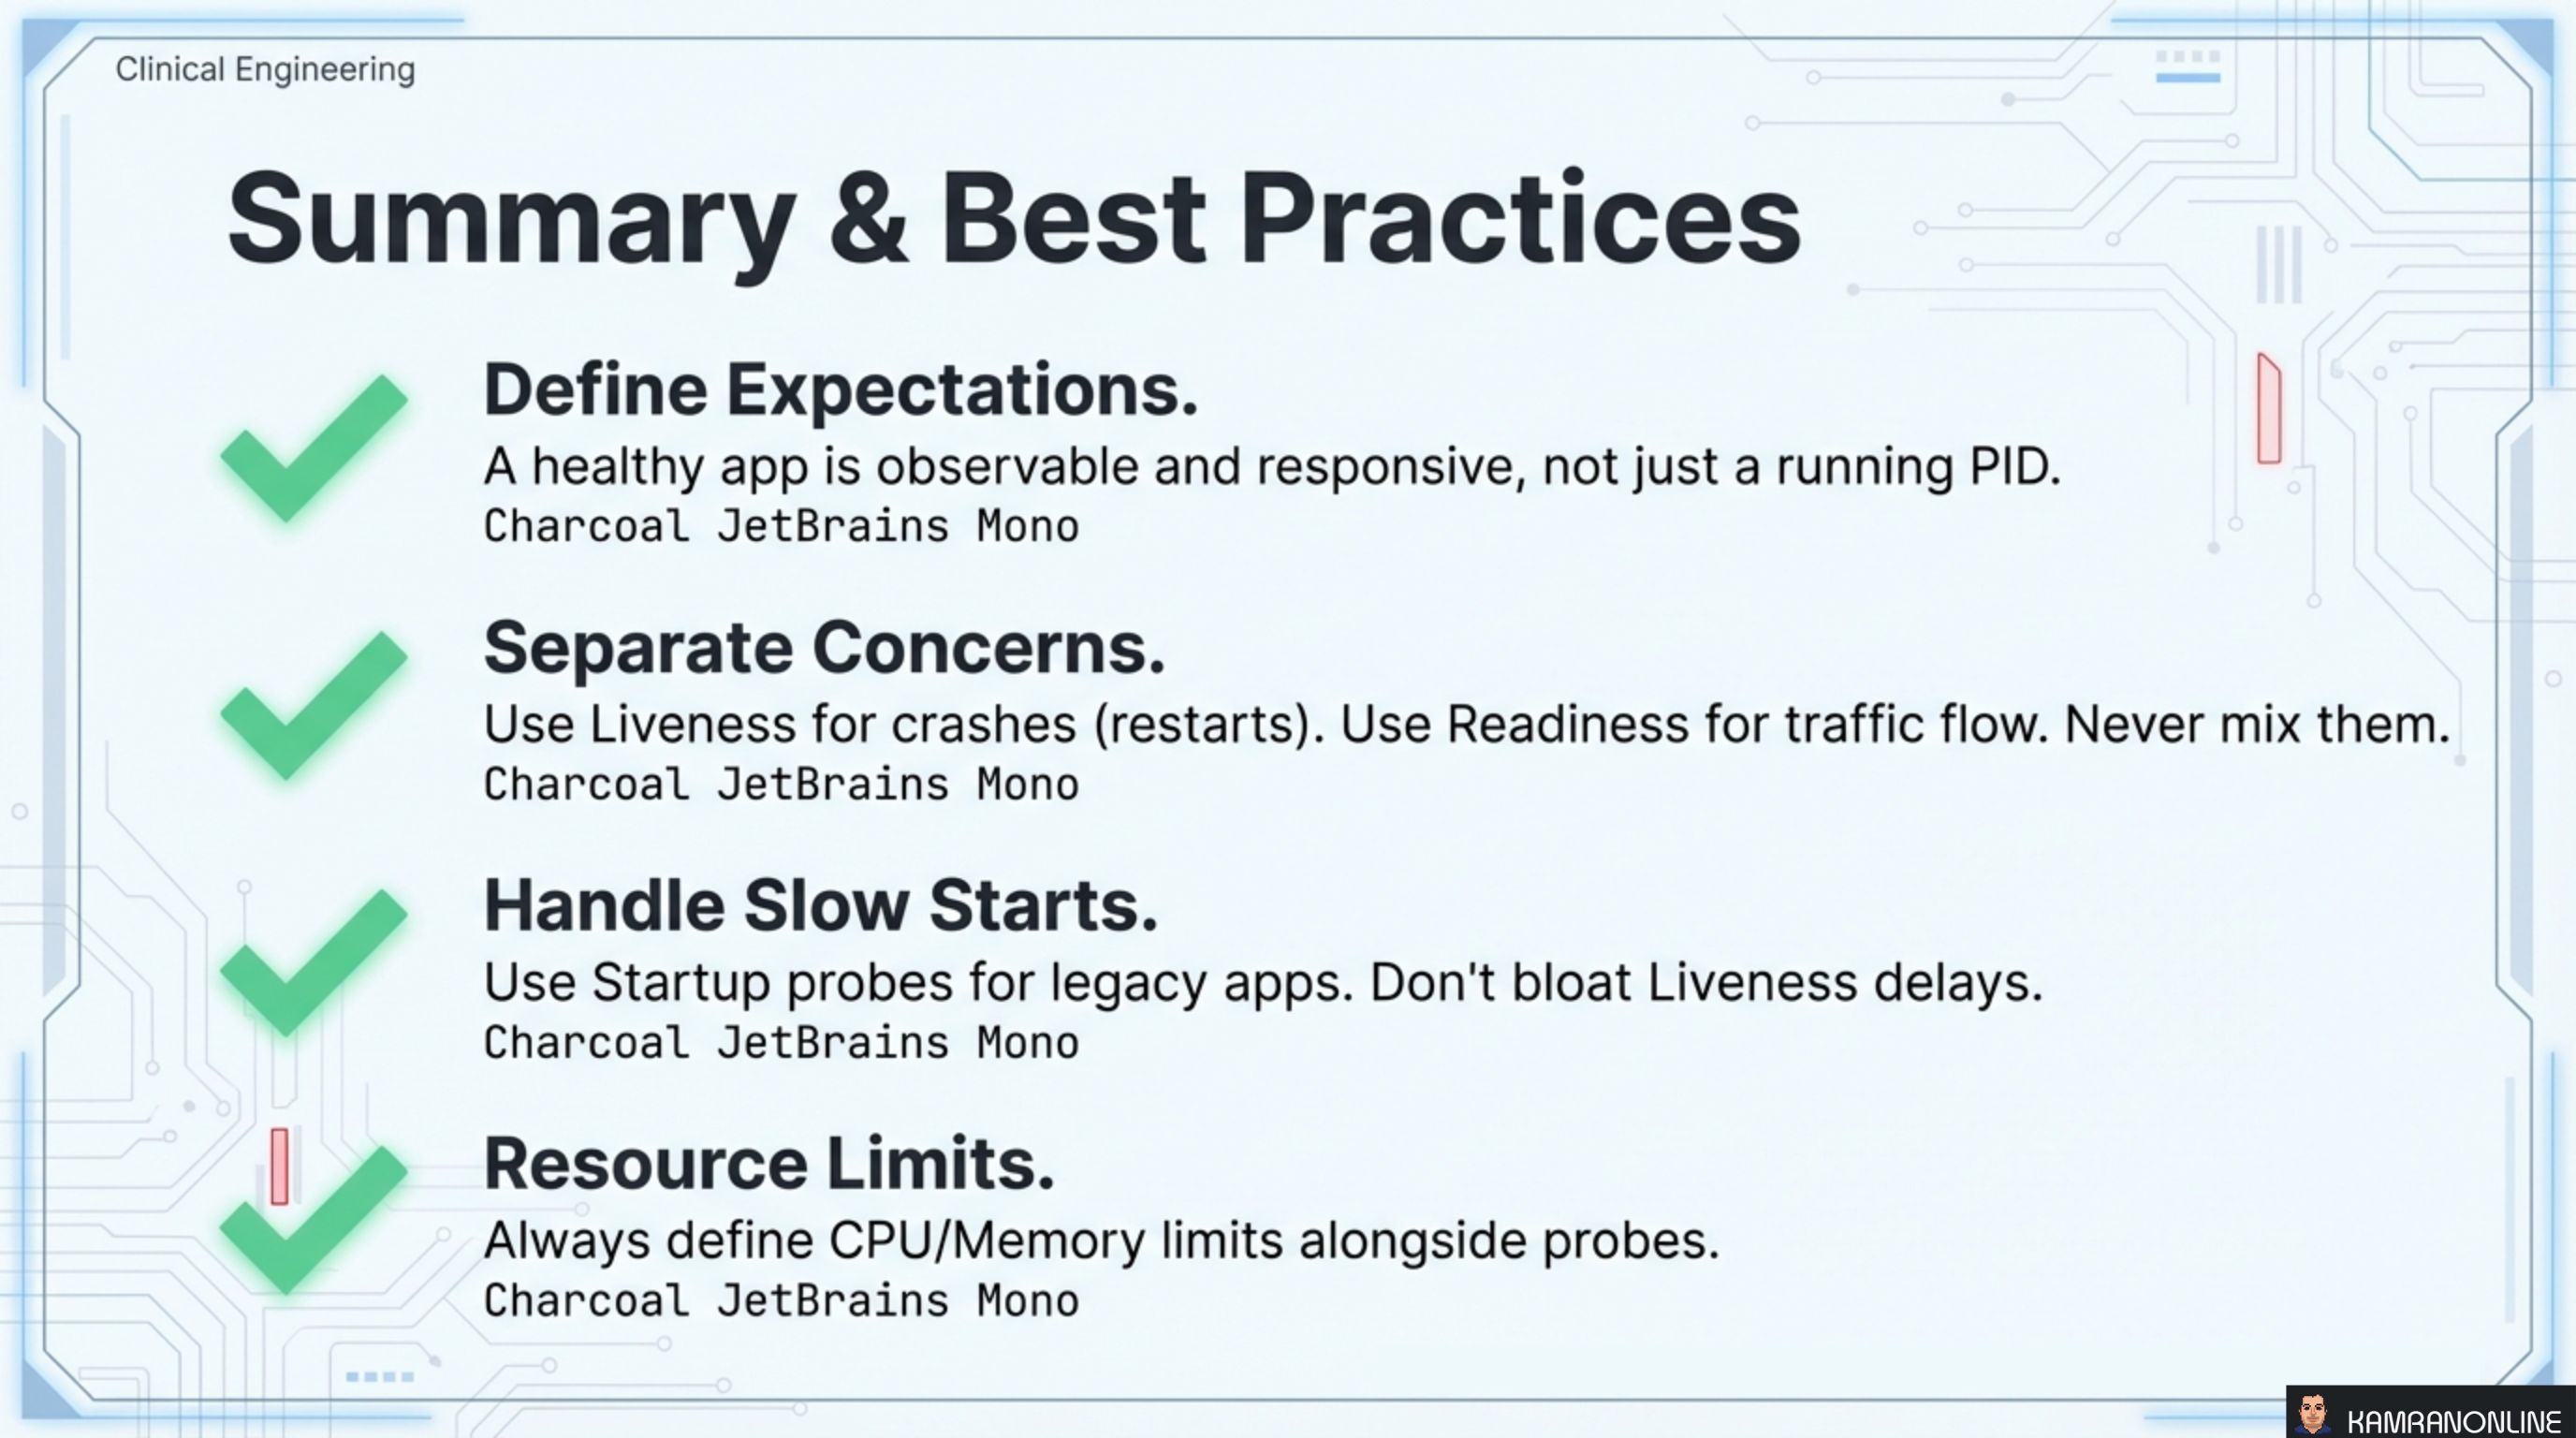
Four rules to carry forward:
-
Define Expectations. A healthy app is observable and responsive, not just a running PID. If your application doesn’t expose health endpoints, probes have nothing meaningful to check.
-
Separate Concerns. Use Liveness for crashes (restarts). Use Readiness for traffic flow (isolation). Never mix them. A readiness check in a liveness probe causes unnecessary restarts. A liveness check in a readiness probe fails to restart genuinely broken pods.
-
Handle Slow Starts. Use Startup probes for legacy apps with long boot times. Don’t bloat
initialDelaySecondson liveness probes — that delays failure detection during normal operation. -
Resource Limits. Always define CPU/Memory limits alongside probes. Without resource limits, a pod can consume unbounded resources and still pass health checks while starving other pods on the same node.
Health probes are the contract between your application and Kubernetes. The application promises to honestly report its state. Kubernetes promises to act on that information. When both sides uphold the contract, the system heals itself.